Chapter 6 - Reading the Current User's Profile
Most forms want to know who is filling them in: to pre-fill a requester name, to pick the right approver, or to show a manager-only section. This chapter builds that from the pieces in the earlier chapters: a data connection, a qRules command run on form load, and a Set a field value action that copies a profile property into the form.
6.1 How it works
- The template has a SOAP Web Service data connection called GetUserProfileByName. It points at SharePoint's user profile service and receives the profile as a list of name/value pairs.
- On form load, the qRules command GetUserProfileByName fills that connection with the profile of the user who opened the form.
- Action rules copy the properties you need (PreferredName, Email, Department, and so on) from the connection's data into main fields.
The sample template already ships with the connection and the qRules data source, so the walkthrough starts there. If your template does not have them yet, see 6.6.
6.2 The data connection
Open the Data Connections ribbon tab and pick GetUserProfileByName in Select Connection.
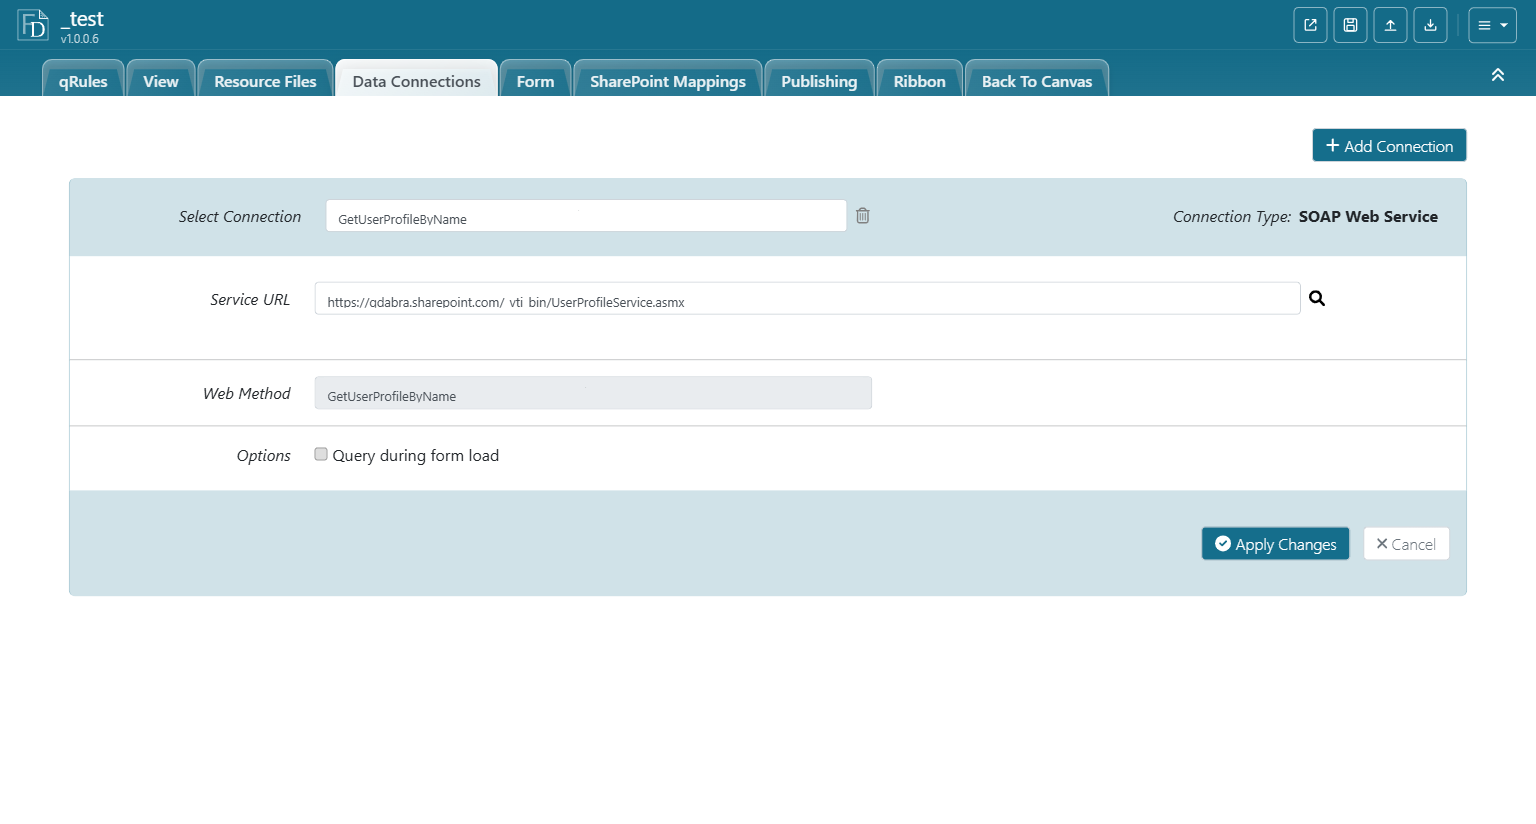
| Setting | Value |
|---|---|
| Connection Type | SOAP Web Service |
| Service URL | https://<your tenant>.sharepoint.com/_vti_bin/UserProfileService.asmx |
| Web Method | GetUserProfileByName |
| Query during form load | Leave unchecked. The qRules command performs the query with the correct parameters. |
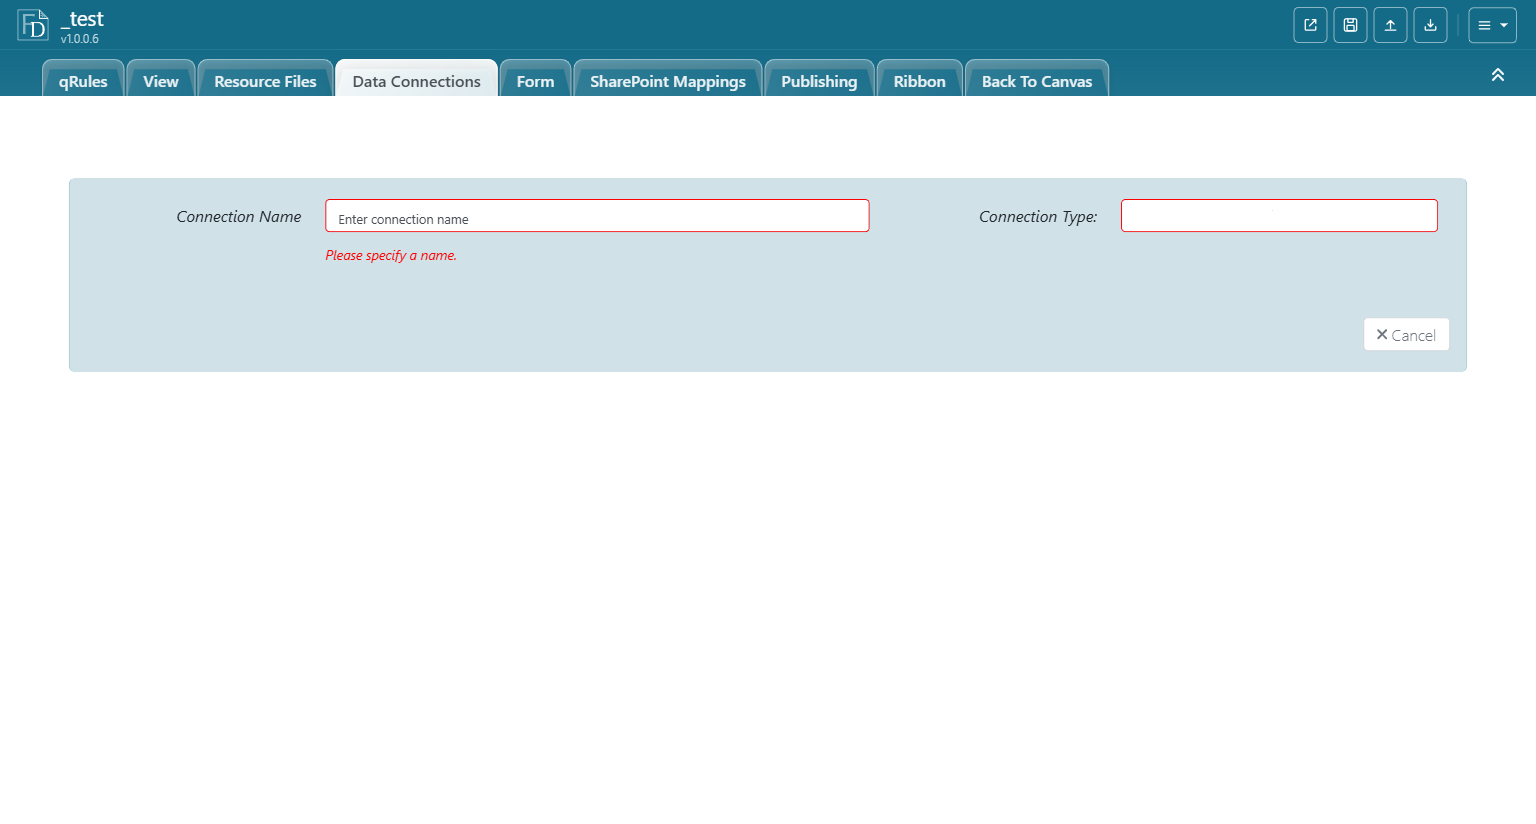
Add Connection shows the other connection types available: Query SharePoint List, Query XML File/REST Service, SOAP Web Service, Submit by E-mail, Submit to SharePoint Library.
6.3 What comes back
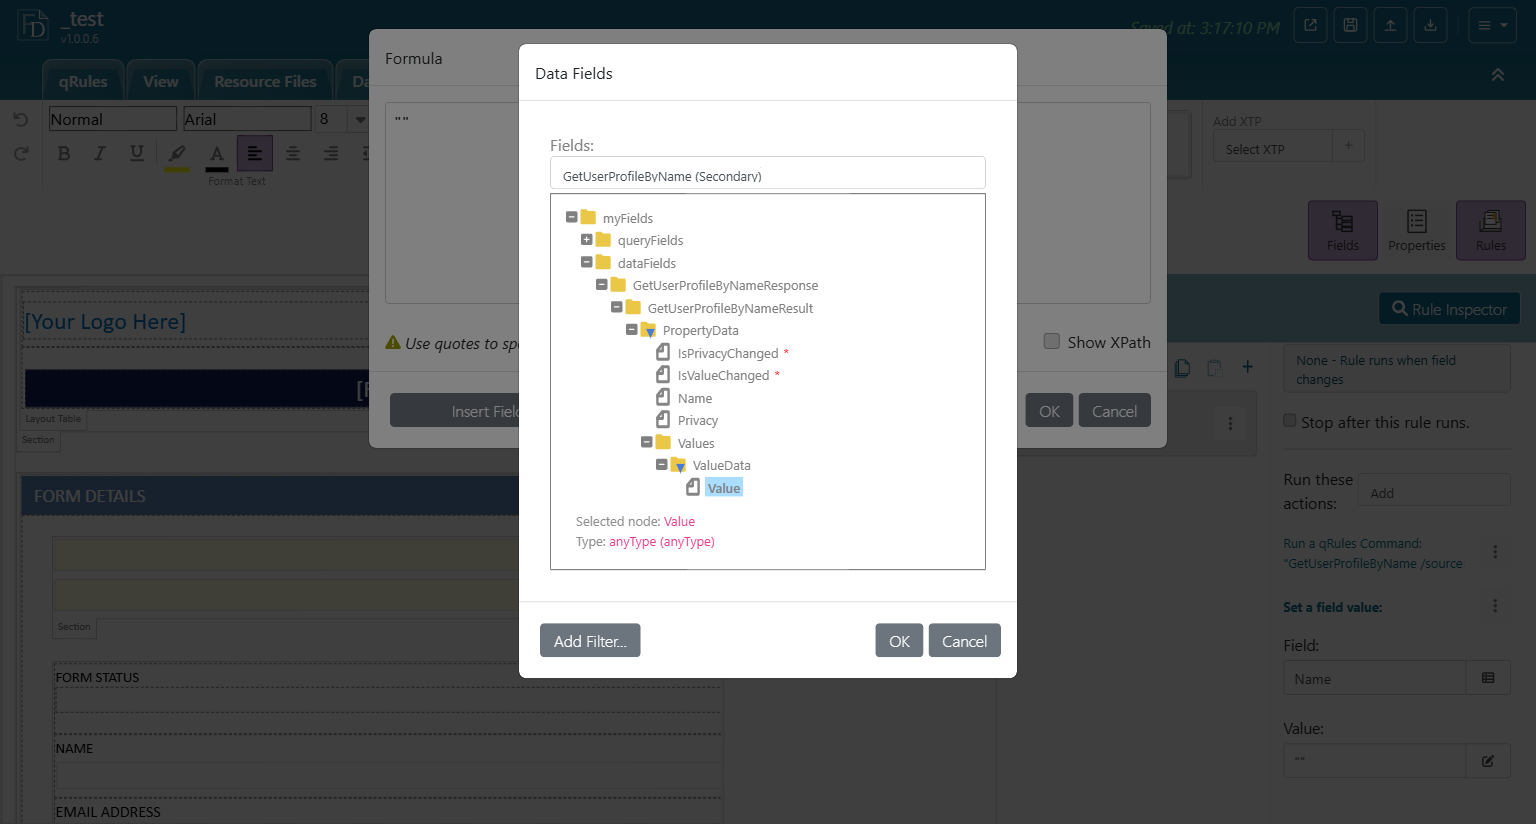
Switch the Data Fields dropdown to GetUserProfileByName (Secondary) to see the shape of the result. The profile arrives under dataFields > GetUserProfileByNameResponse > GetUserProfileByNameResult > PropertyData, one repeating PropertyData per property, each with a Name and a Values > ValueData > Value.
Property names returned with /source=siteusers (the site's User Information List):
| Property name | Contents |
|---|---|
| PreferredName | Display name |
| E-mail address | |
| AccountName | Login account (claims format) |
| Department | Department |
| Title | Job title |
Manager and other properties that live only in the user profile store are not returned by default. To get them either:
- add
/properties=Manager;OtherPropertyto the command and have a SharePoint administrator mark those properties as Replicable (SharePoint admin center > User Profiles > Manage User Properties; replication to sites can take up to 24 hours), or - use
/source=profiles, which reads the full profile store but requires the FormsViewer app to be granted the user-profile permission for the tenant.
Manager comes back as an account name. To show the manager's display name or e-mail, run GetUserProfileByName a second time with /user=<that account name> and read the second result.
6.4 Building the on-load rule
Step 1 - run the command on load
- Form tab, then Form Load Rules.
- Click + and name the rule, for example "Load user profile".
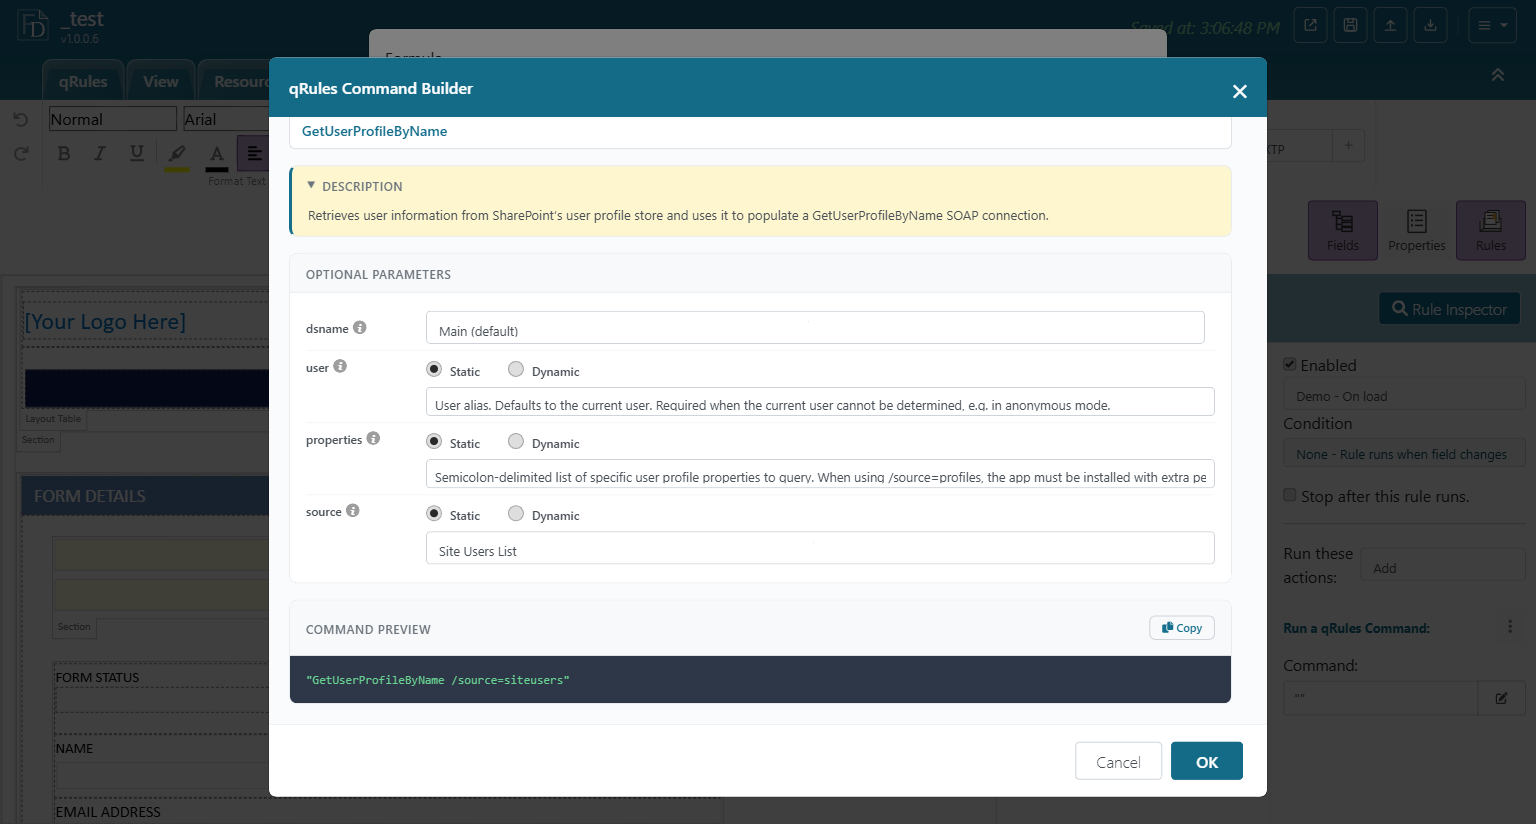
- In Add, choose Run a qRules Command, click the edit button next to Command, and click Insert qRules Command.
- Search for GetUserProfileByName and select it.
- Leave dsname as default (the connection with the same name) and user empty (current user). Set source to Site Users List unless you need profile-store-only properties; it works on any site without extra permissions. User Profile Store returns the full profile but needs the tenant-level app permission. Use properties for a semicolon-separated list when you need specific non-default properties (see 6.3). The user parameter is required when the current user cannot be determined, for example in anonymous forms; the user profile service returns nothing for anonymous users.
- Click OK twice. The command reads
"GetUserProfileByName /source=siteusers".
Step 2 - copy a property into a field
- In the same rule, Add > Set a field value.
- Field: pick the main field to fill, for example Name.
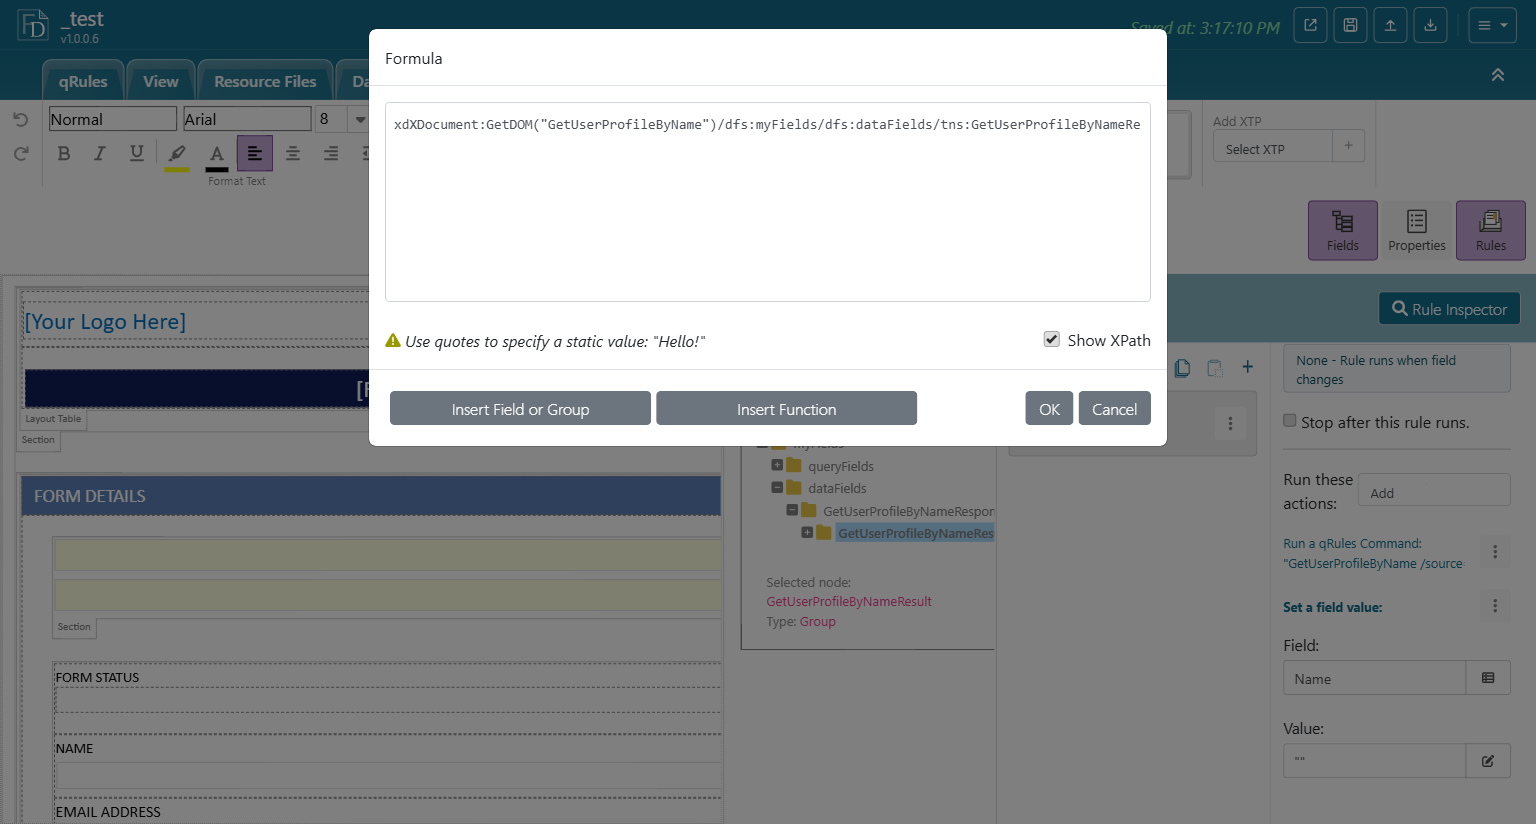
- Value: click fx, then Insert Field or Group.
- In the picker switch Fields to GetUserProfileByName (Secondary), expand down to
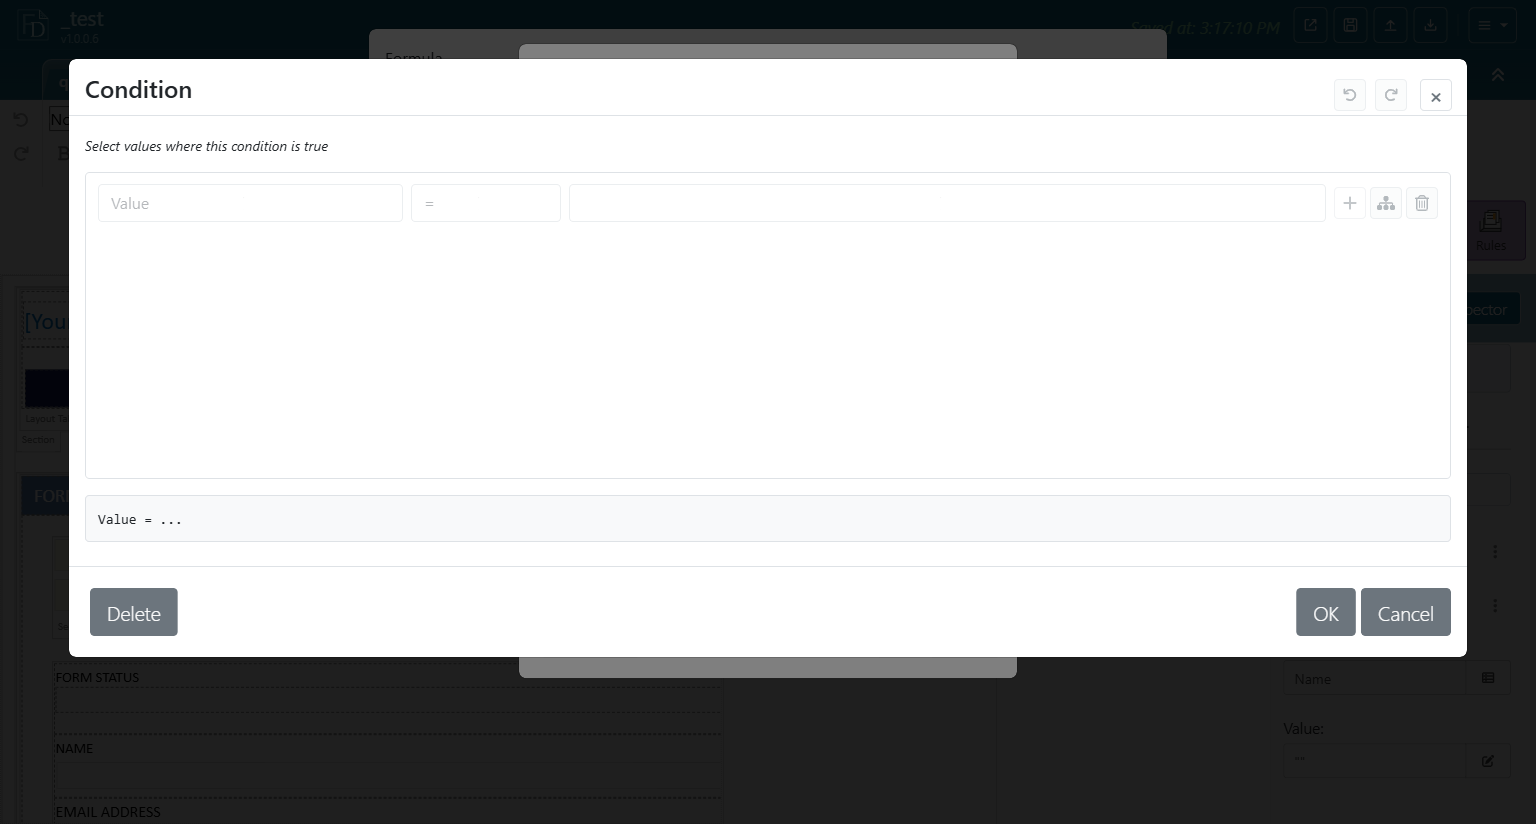
PropertyData > Values > ValueData > Value, and select Value. - Click Add Filter.... The filter editor is the Condition editor from Chapter 2, titled "Select values where this condition is true".
- Choose The expression and enter
../../../tns:Name = "PreferredName". The namespace prefix must match the one the picker generates for this data source (turn on Show XPath to see it; it istns:in the sample template and may be another prefix such asns5:in yours). Without the prefix the editor reports "Could not resolve Name". - OK in the filter, OK in the picker. The formula box now reads
Value[Name = "PreferredName"]. - OK to save the action.
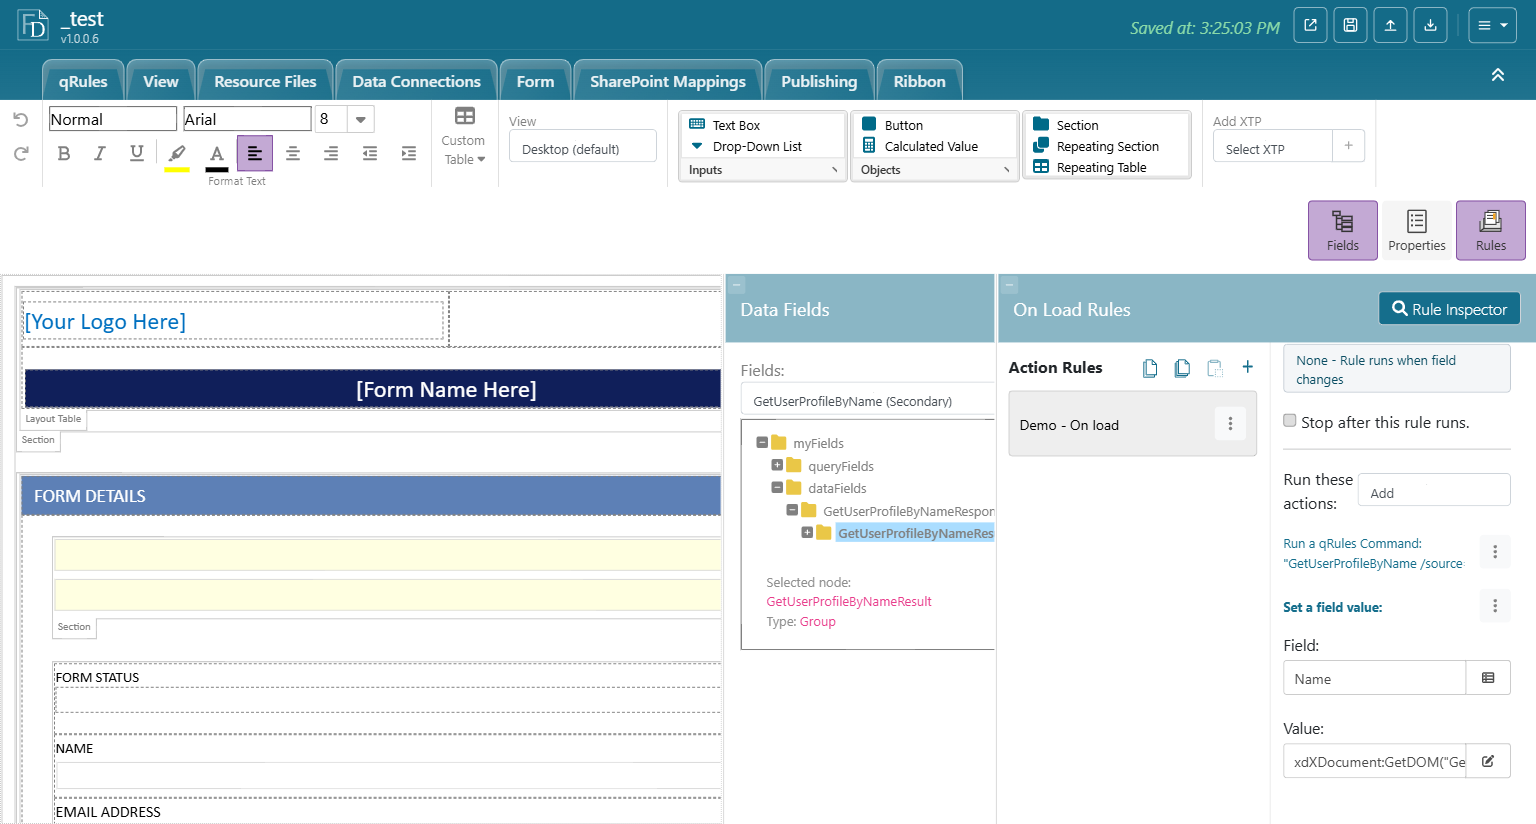
Repeat Step 2 for each property you need (Email into an e-mail field, Department into a department field, and so on; see 6.3 for Manager). Keep the command action first and the Set actions after it; actions run in order.
Step 3 - test
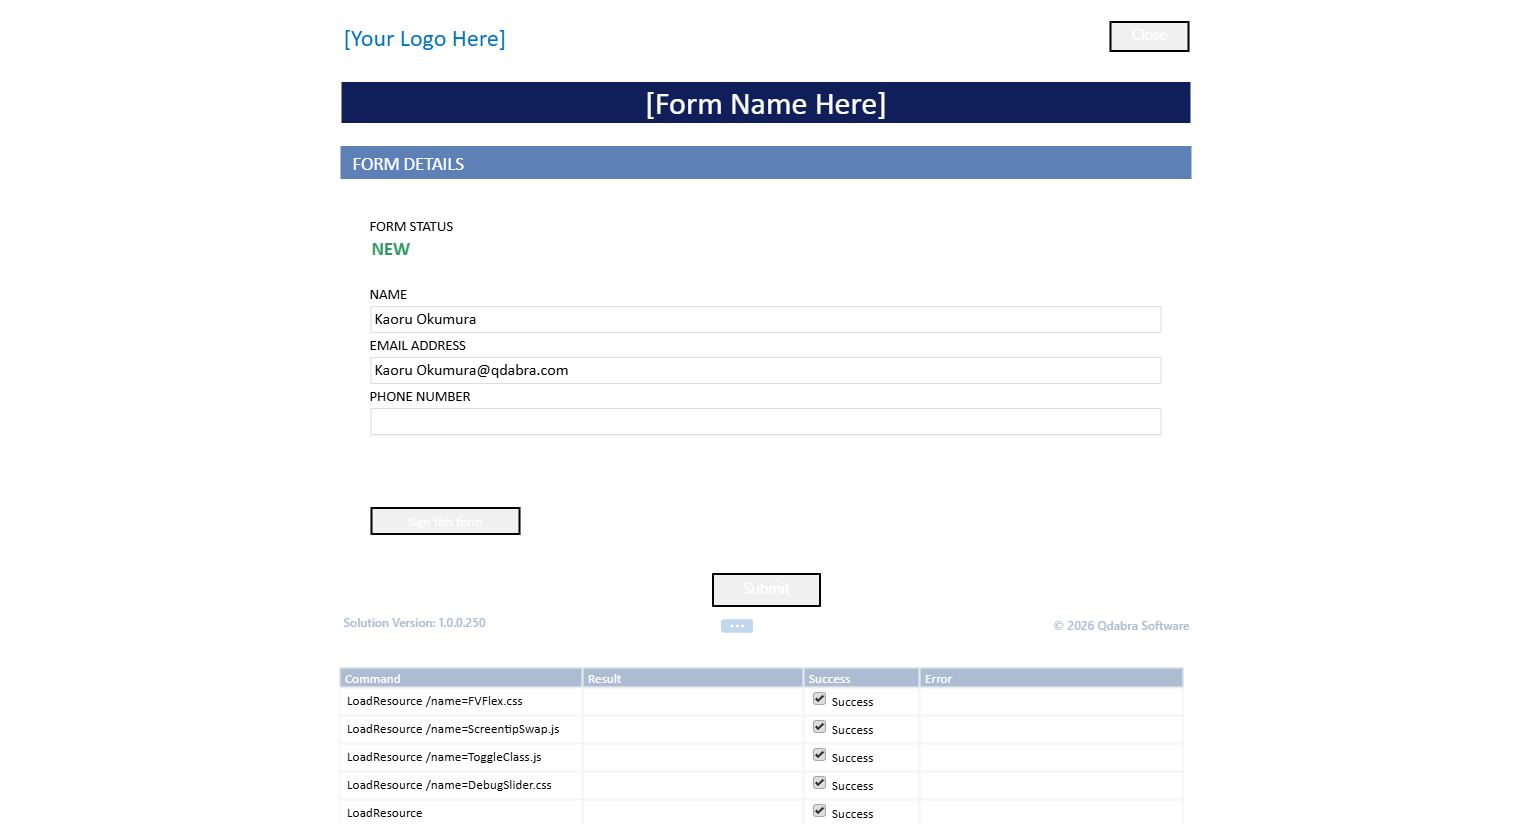
Click Open (Ctrl+O) in the title bar. The form opens with the name already filled in. In the sample template the Chapter 3 rule on Name then fills the e-mail address, and the Chapter 5 rule shows the phone box.
6.5 Using the profile in conditions
Once the properties are in main fields, conditions are ordinary (Chapter 2):
| Goal | Where | Condition |
|---|---|---|
| Show an approver section to managers only | Formatting rule on the section | IsManager ≠ true -> Hide |
| Route by department | Action rule on a status field | Department = Finance |
| Lock the requester field | Formatting rule on the requester text box | Requester is not blank -> Disable |
Copying into main fields, rather than reading the secondary data source in every condition, keeps the conditions readable and makes the values available after the form is saved.
6.6 If the template does not have the connection yet
Add a SOAP Web Service connection named GetUserProfileByName that points at /_vti_bin/UserProfileService.asmx with the GetUserProfileByName method, and make sure the template has qRules injected (the qRules ribbon tab reports "This form already has qRules!" when it does). The designer also offers Add XTP > Get User, a packaged user lookup; check the XTP's instruction page (the blue i next to Add XTP) for what your build's version injects before relying on it.
6.7 Summary
- Profile data arrives through the GetUserProfileByName SOAP connection, filled by the qRules command of the same name.
- Run the command in an on-load rule, then copy properties with Set a field value and a filtered picker path.
- Use the data source's namespace prefix in filter expressions; non-default properties such as Manager need
/propertiesplus replication, or/source=profiles. - Test with Open (Ctrl+O); the draft runs as saved.