Chapter 2 - Conditions
A condition decides whether a rule acts. Action rules use it as an on/off switch, formatting rules apply their formatting while it is true, and validation rules flag the field while it is true. This chapter covers the Condition editor, which is the same for all three kinds of rules.
2.1 Opening the Condition editor
In the Rule Details panel, click the Condition line. For a new rule it reads "None - Rule runs when field changes".
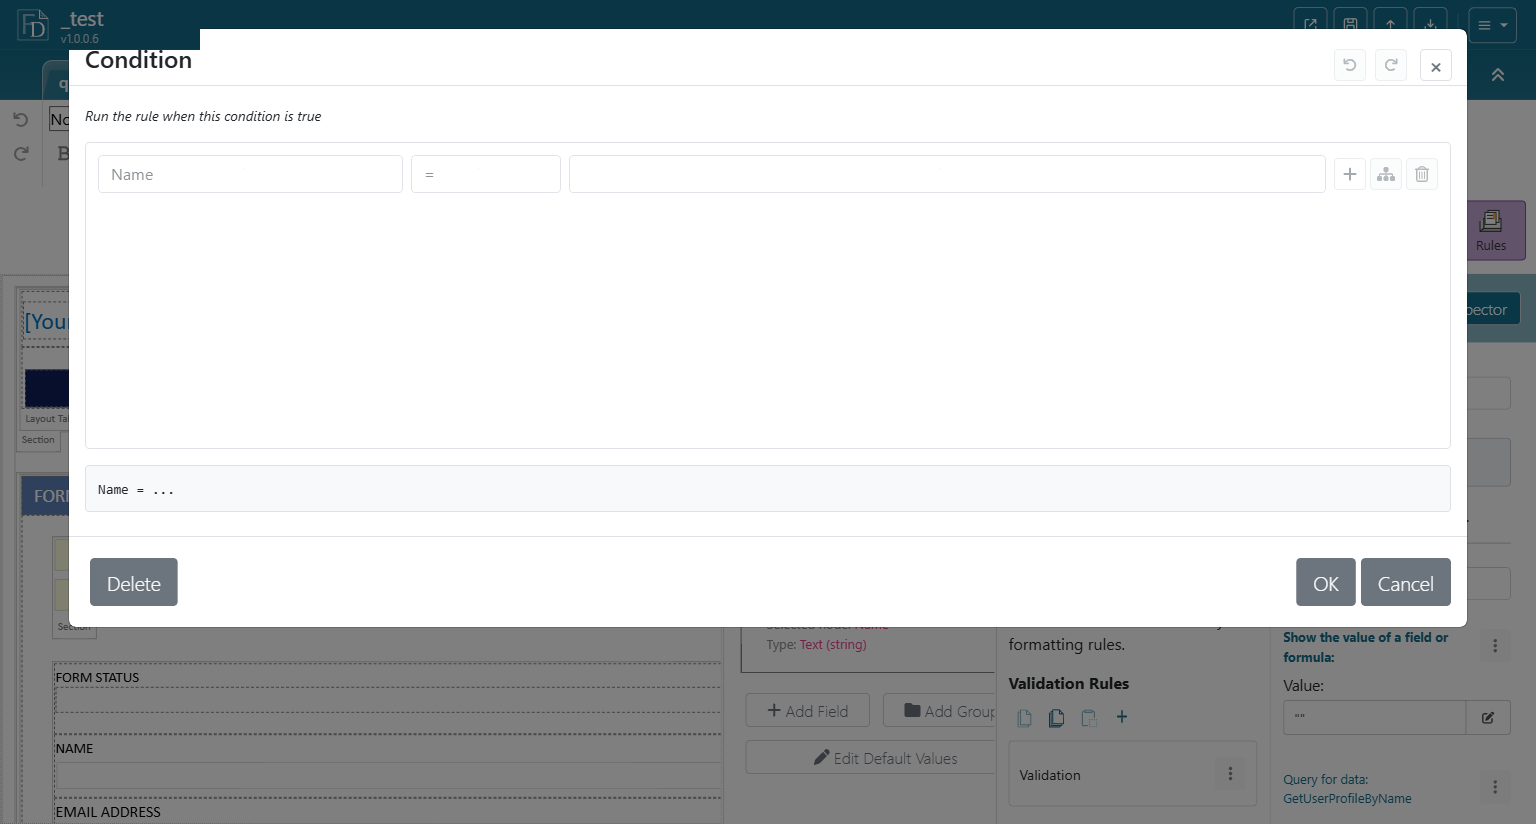
The editor has four areas:
| Area | Purpose |
|---|---|
| Rows | Each row is one comparison: field / operator / value. |
| Row buttons (right side) | + adds a row after this one. The tree icon converts the row into a nested AND/OR group. The trash can deletes the row. The last two are disabled while there is only one row. |
| Condition text | The strip under the rows shows the whole condition written out as an expression, updated as you edit. It is exact rather than easy to read, so use it to confirm the logic before you click OK. |
| Footer | Delete removes the condition completely (back to "None"). OK saves. Cancel discards your edits. Undo and Redo are in the header. |
2.2 Building one comparison
The field
The first dropdown offers:
- The rule's own field and its sibling fields (fields in the same group), by name.
- The expression - replaces the whole row with a single XPath box. See 2.5.
- Select a field or group... - opens the Data Fields picker so you can pick any field in any data source, including secondary data sources and repeating groups.
What the first entries are depends on what owns the rule. For a rule on a field, the starting point is that field, so its siblings are listed. For a rule on a control such as a text box (formatting rules, Chapter 5), the starting point is the parent group of the bound field, so the dropdown shows the group name first; for a rule on a section or repeating table it is the bound group itself; for a button or form-load rule it is the form's root group. Whatever the starting point, Select a field or group... reaches every field, so use it whenever the field you want is not listed. If you are unsure what a condition refers to, switch the row to The expression and read the XPath: . is the starting point described here.
The operator
| Group | Operators |
|---|---|
| Compare | = , ≠ , < , ≤ , > , ≥ |
| Presence | is present, is not present |
| Emptiness | is blank, is not blank |
| Text | contains, does not contain, begins with, does not begin with |
| Pattern | matches pattern, does not match pattern |
is blank means the field exists but has no value. is not present means the node does not exist at all, which matters for optional elements and repeating rows. For everyday "the user typed something" checks, use is blank / is not blank.
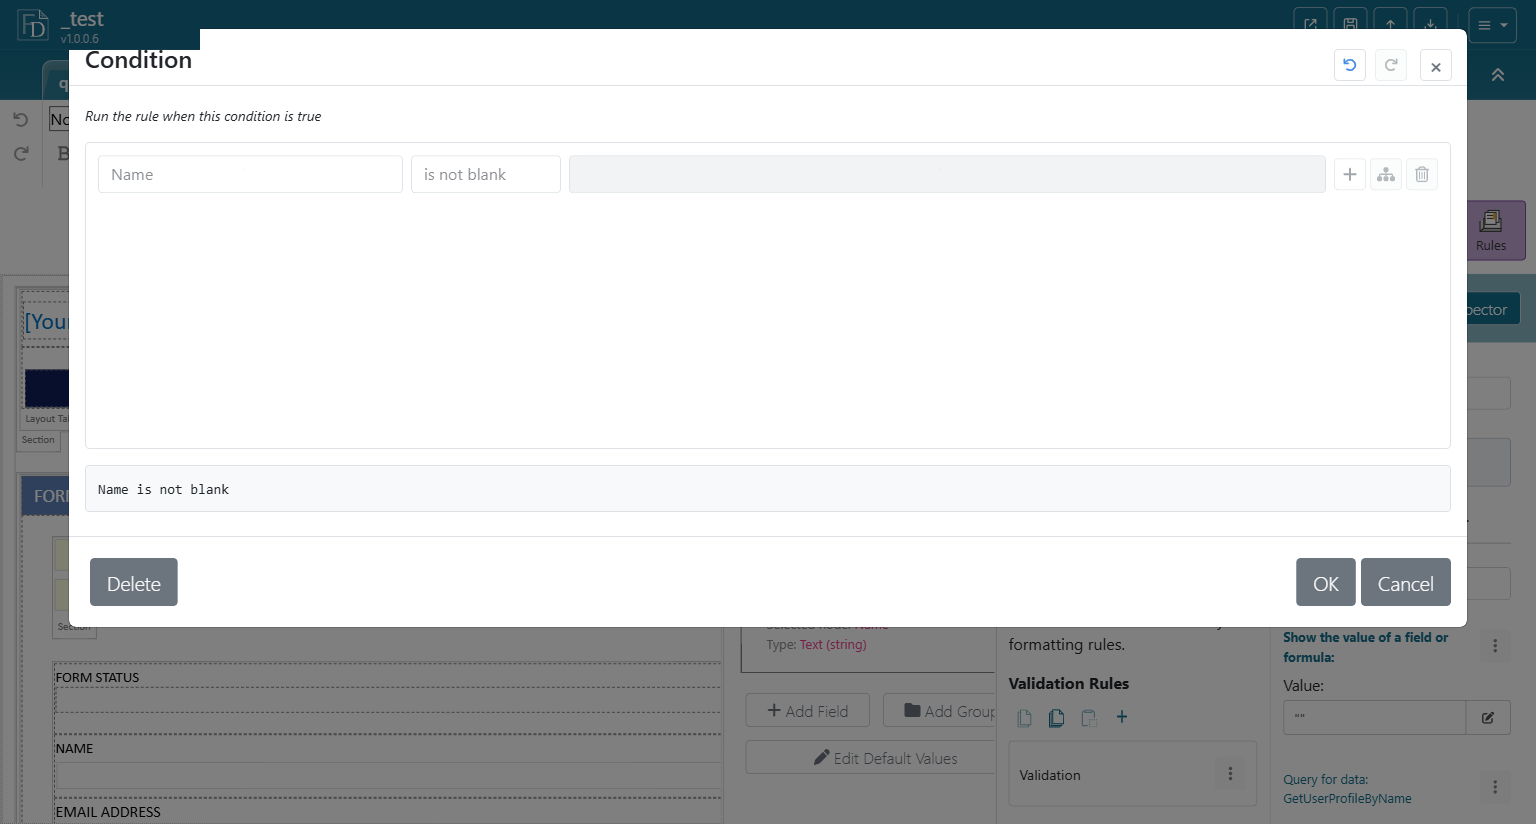
When the operator does not need a value (the presence and emptiness groups), the value box is disabled.
The value
The third dropdown decides what the field is compared with:
| Choice | What happens |
|---|---|
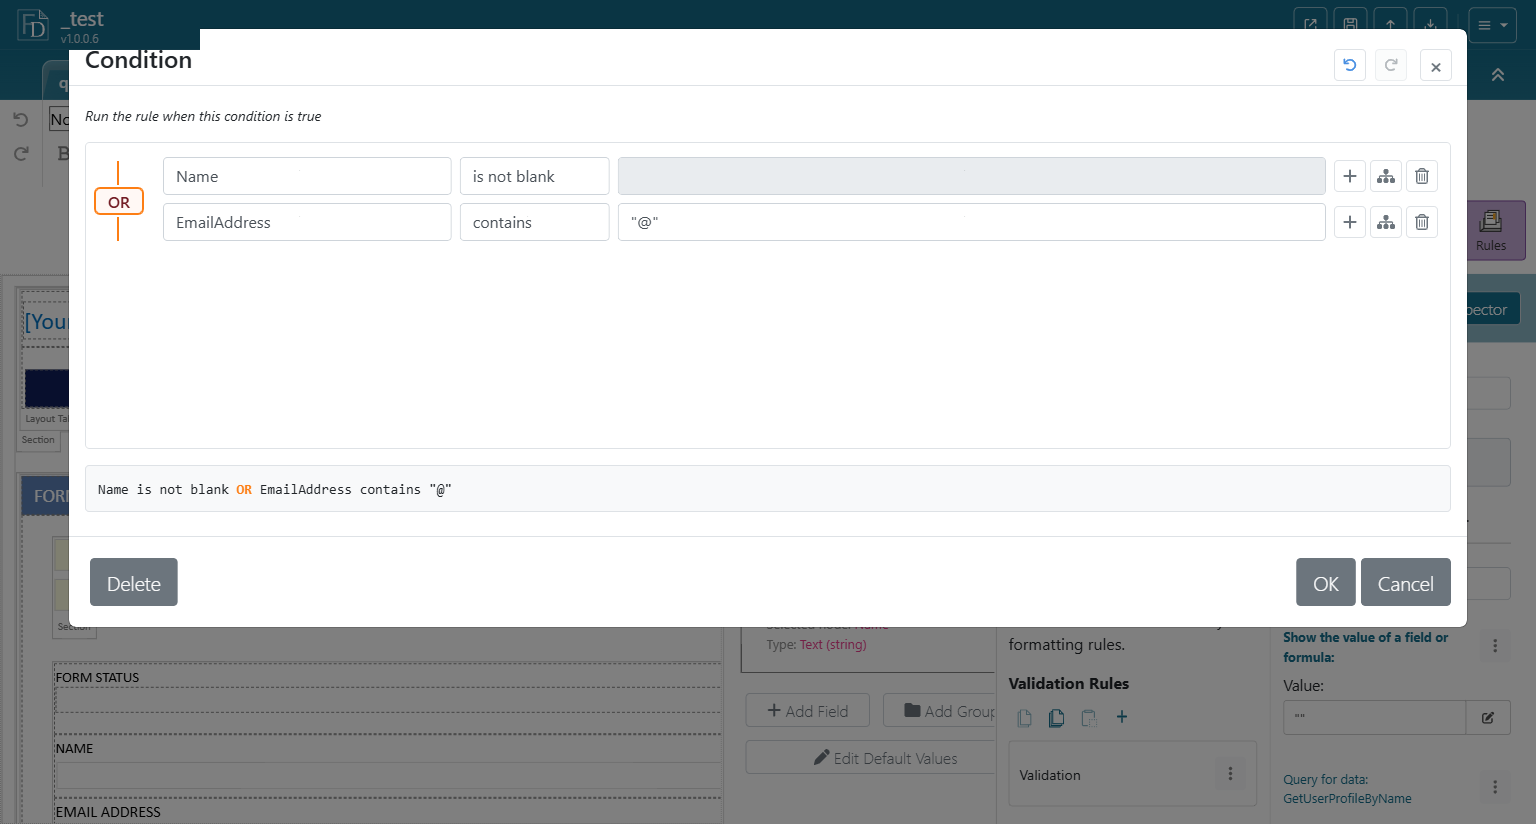
| Type text... | A text box appears. Type the literal text. The condition text shows it in quotes, for example "@". |
| Type number... | Same, for a numeric literal. Only offered for numeric comparisons. |
| Select a field or group... | Compare with another field. Opens the Data Fields picker. |
| Use a formula... | Opens the Formula editor (see Chapter 3, section 3.3) so you can compare with a calculated value such as today(). |
The list adapts to the operator. For example contains only offers Type text... and Use a formula....
2.3 Combining rows with AND / OR
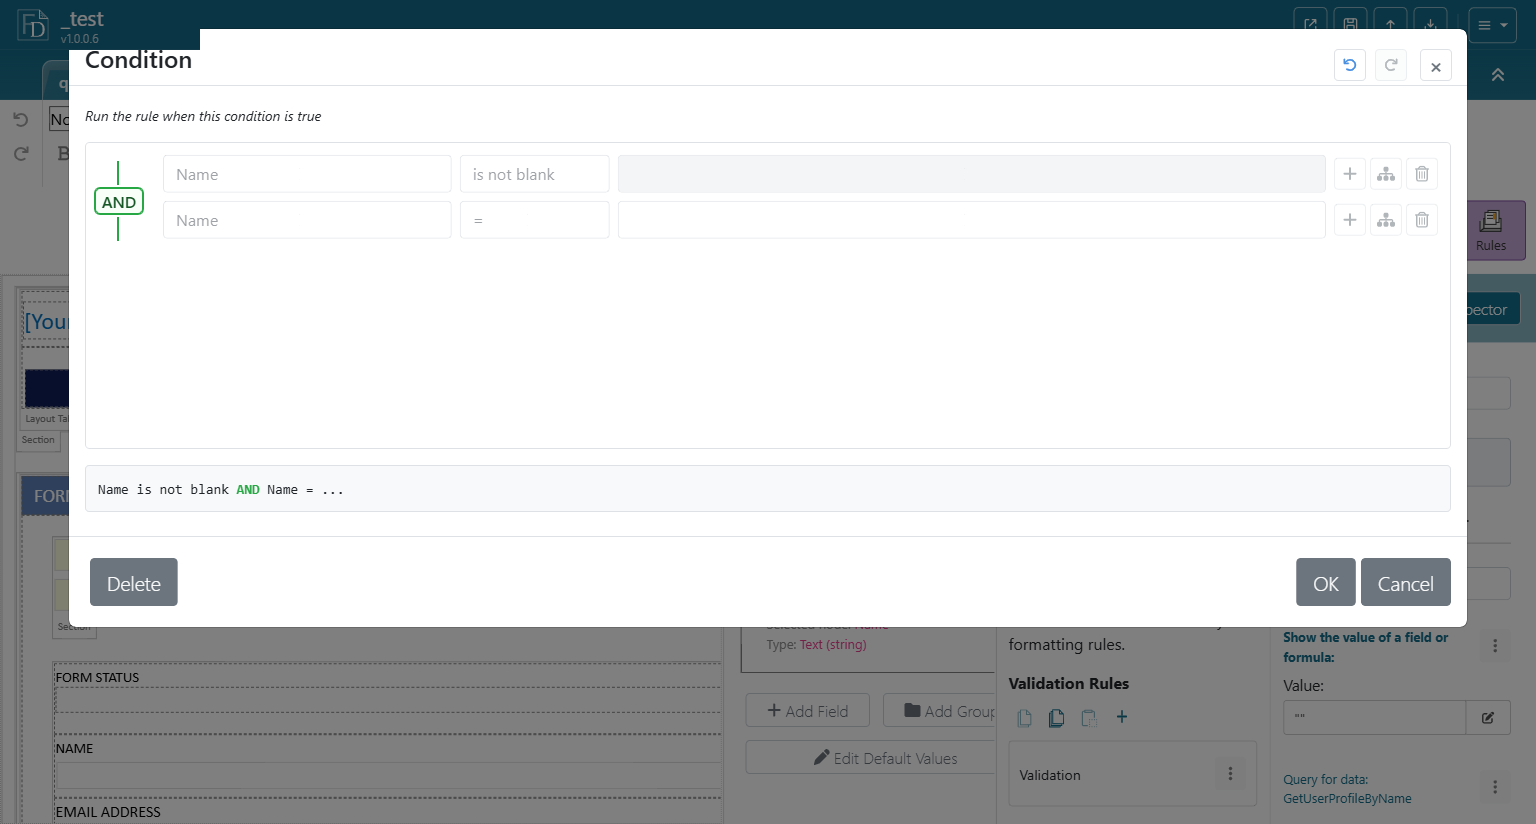
Click + on a row to add another row after it. A vertical bar with a toggle appears on the left. The toggle reads AND (green) or OR (orange); click it to switch. One toggle applies to every row in that group, so you cannot mix AND and OR at the same level without a nested group.
2.4 Nested groups
To express something like A or (B and C), convert a row into a group:
- Click the tree icon on the row that should start the inner group.
- The row moves into a box with its own AND/OR toggle, and an empty row is added inside the group.
- Fill in the inner rows and set the inner toggle.
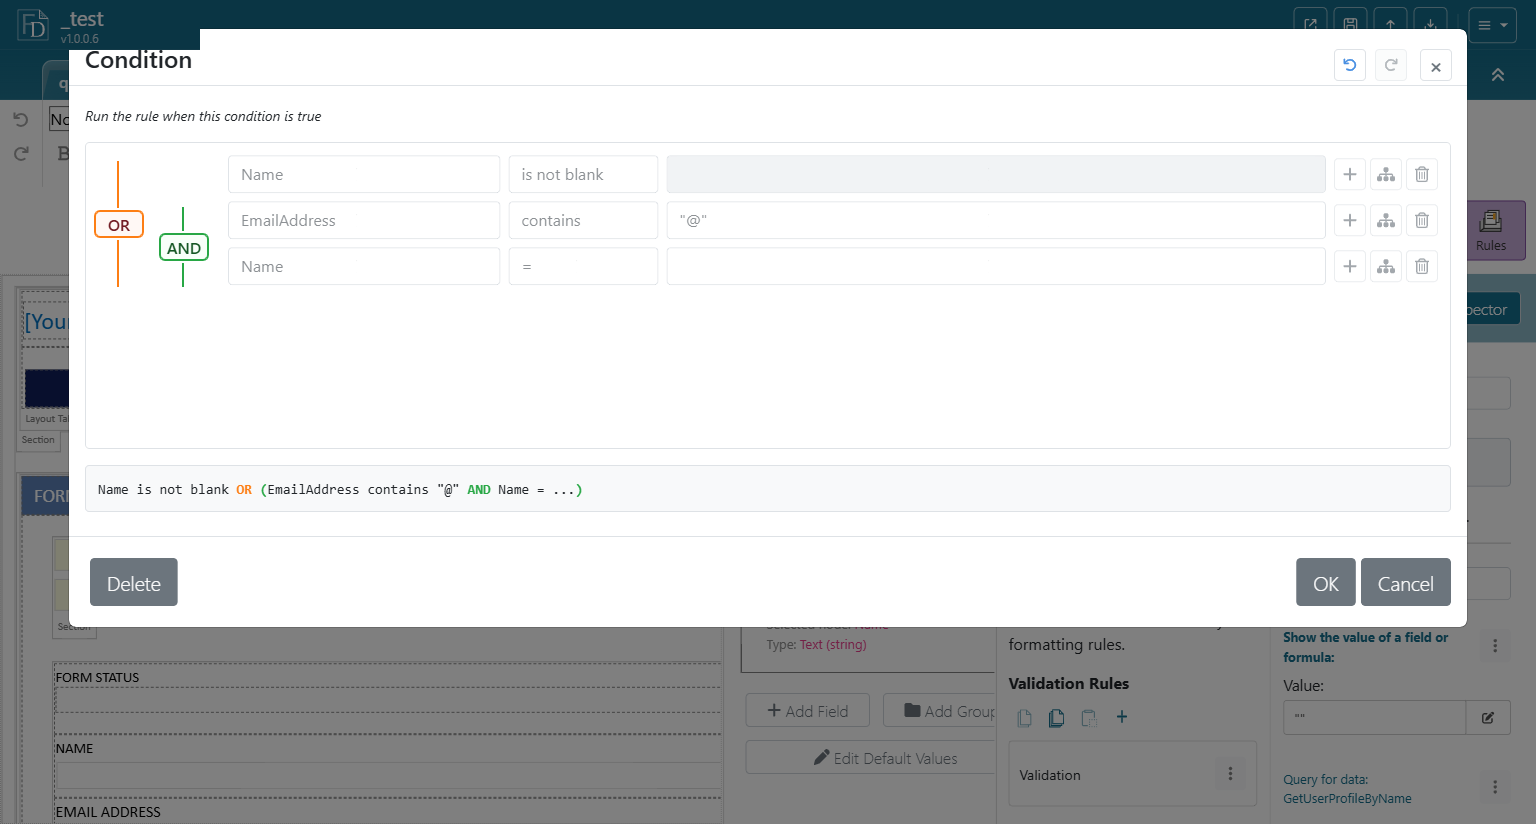
The condition text under the rows shows the exact logic, parentheses included. It takes a moment to read, but it is the only place that shows precisely what will be saved, so check it before you click OK.
2.5 Writing the condition as an expression
Choose The expression in the field dropdown when the visual builder cannot say what you need, for example a count() over a repeating table or a comparison against a value in a secondary data source with a filter. The row collapses to one text box that holds an XPath boolean expression. Click it to open the editor.
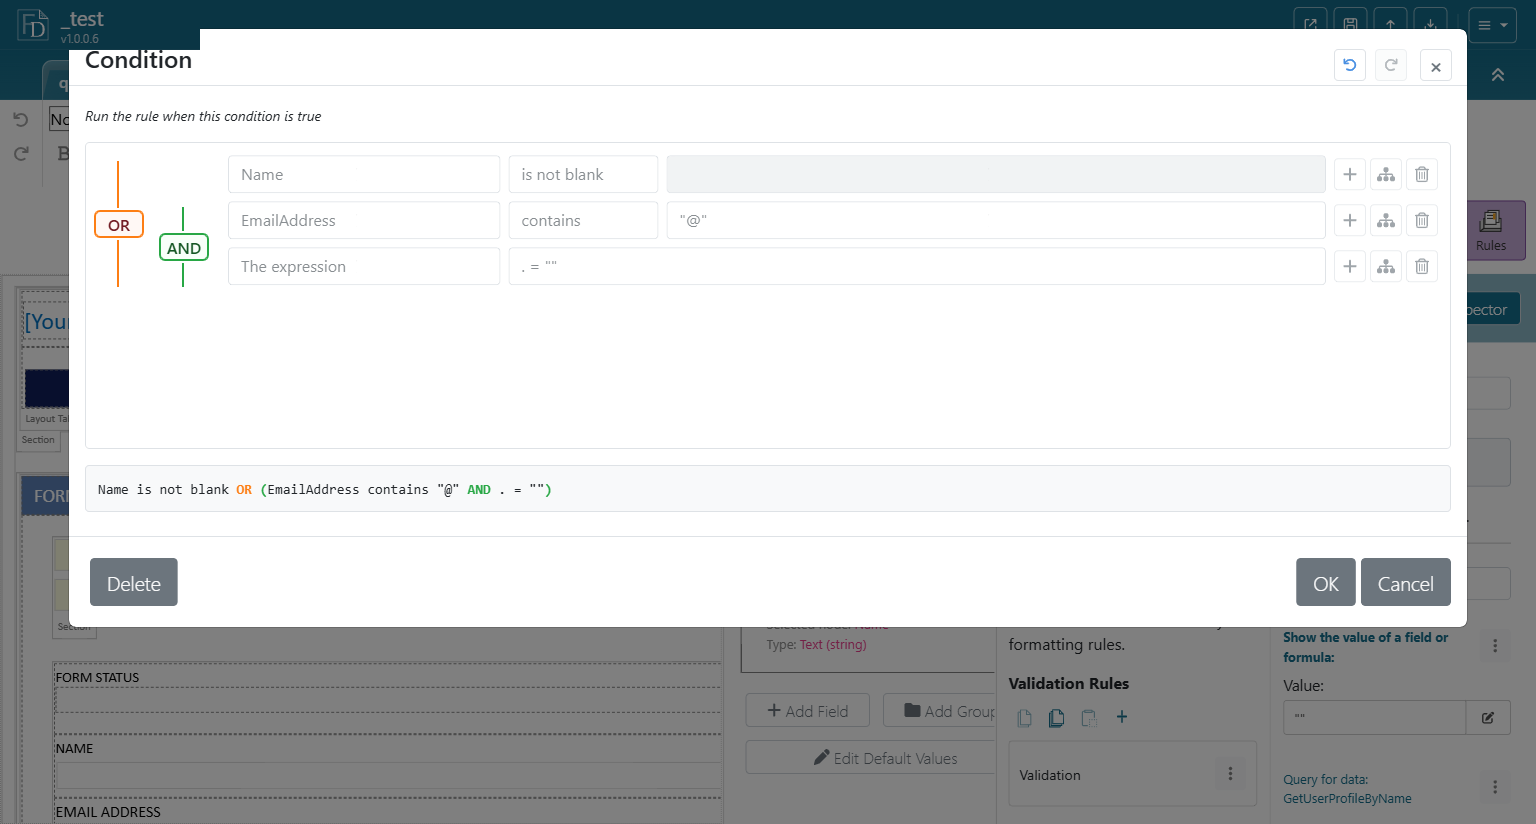
Rules of thumb for expressions:
.refers to the rule's own field.- Sibling fields are
../my:FieldName. - Insert fields with the picker rather than typing the name. A bare field name such as
Namedoes not resolve and the editor rejects it. - Quote literal text:
. = "Approved".
2.6 What the saved condition looks like
After OK, the Condition line in Rule Details shows the condition in readable form, in green.
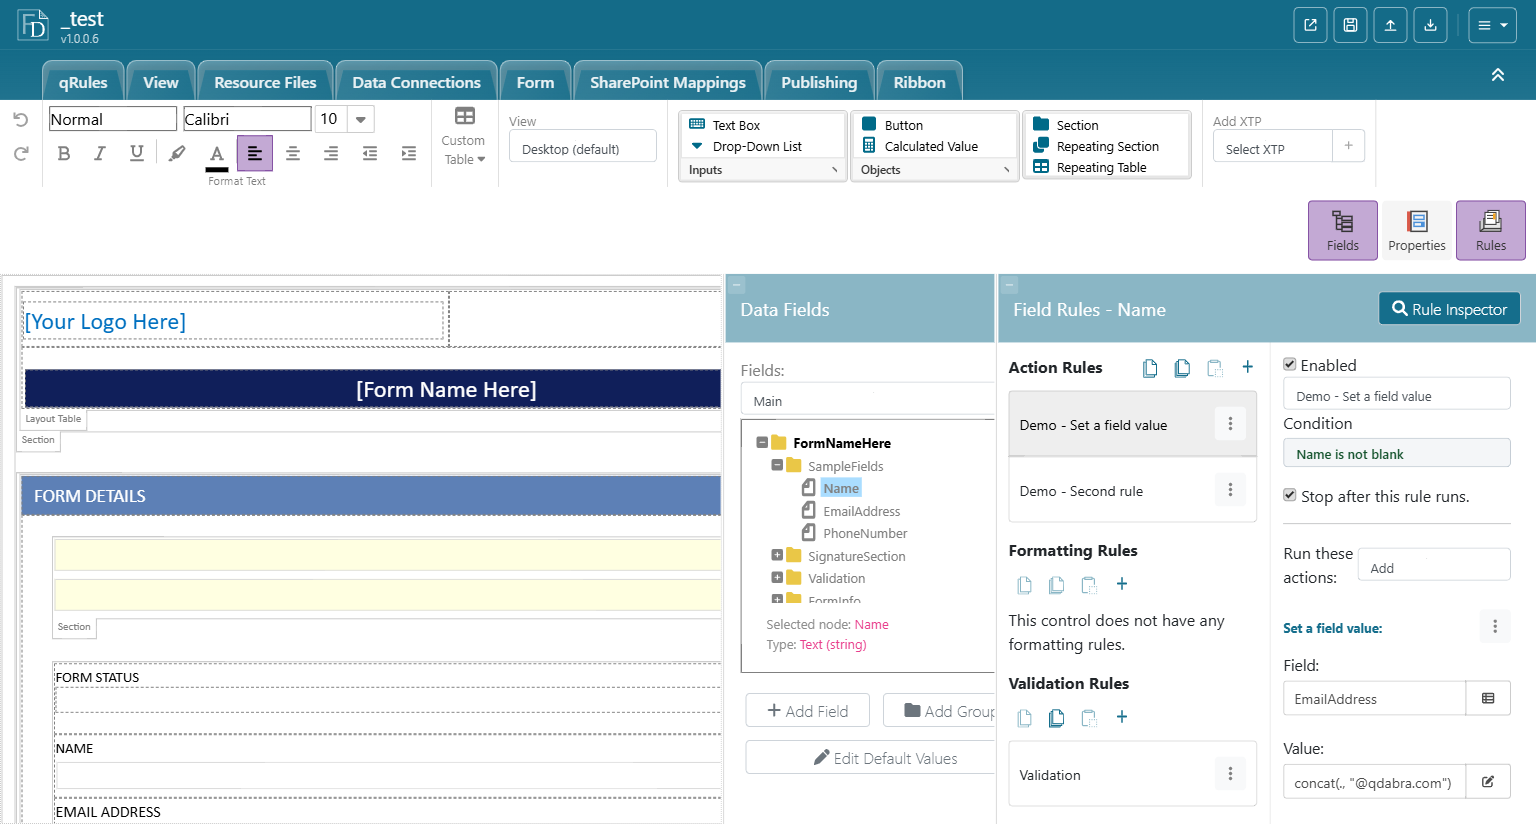
To change it, click the line again. To remove it, open the editor and click Delete.
2.7 Common patterns
| Goal | Condition |
|---|---|
| Field has a value | Field is not blank |
| Field equals a fixed choice | Status = Type text... Approved |
| Text contains a marker | EmailAddress contains Type text... @ |
| Date is in the past | DueDate < Use a formula... today() |
| Either of two flags | A = true OR B = true |
| Required only when another field is set | Comment is blank AND NeedsComment = true (as a validation rule on Comment) |
| Row count check on a repeating table | The expression: count(../my:Items/my:Item) = 0 |
2.8 Summary
- One row = field, operator, value. Add rows with +, group them with the tree icon.
- One AND/OR toggle per group; nest groups for mixed logic.
- Before OK, read the condition text under the rows; it shows exactly what will be saved.
- Use The expression for anything the builder cannot express, and insert fields with the picker.
Next: Chapter 3 - Action Rules.