Chapter 4 - Validation Rules
A validation rule flags a field whose value needs attention and carries the message that explains why. When the check runs, FormsViewer draws a red border around the control. Section 4.1 explains how the check is started and how the messages reach the user.
4.1 Important: validation rules run only when you ask for them
Adding a validation rule does not by itself check anything while the user types. The check happens when the form runs one of two qRules commands:
| Command | What it does |
|---|---|
| GetErrors | Runs every validation rule, marks the fields that fail, and returns the messages of the failing rules as one text value in QdabraRules > Result. If Result is blank, there are no errors. This is the command used in most forms. |
| GetErrorCount | Same check, but Result holds the number of failing rules instead of the messages. |
So a validation setup always has two halves:
- The validation rules on the fields (this chapter).
- An action rule, normally on the Submit button, that runs
GetErrors, stops when Result is not blank, and shows Result to the user (section 4.6).
Keep this in mind while building: until the second half exists, the rules you add in 4.3 will look like they do nothing.
4.2 Where validation rules live
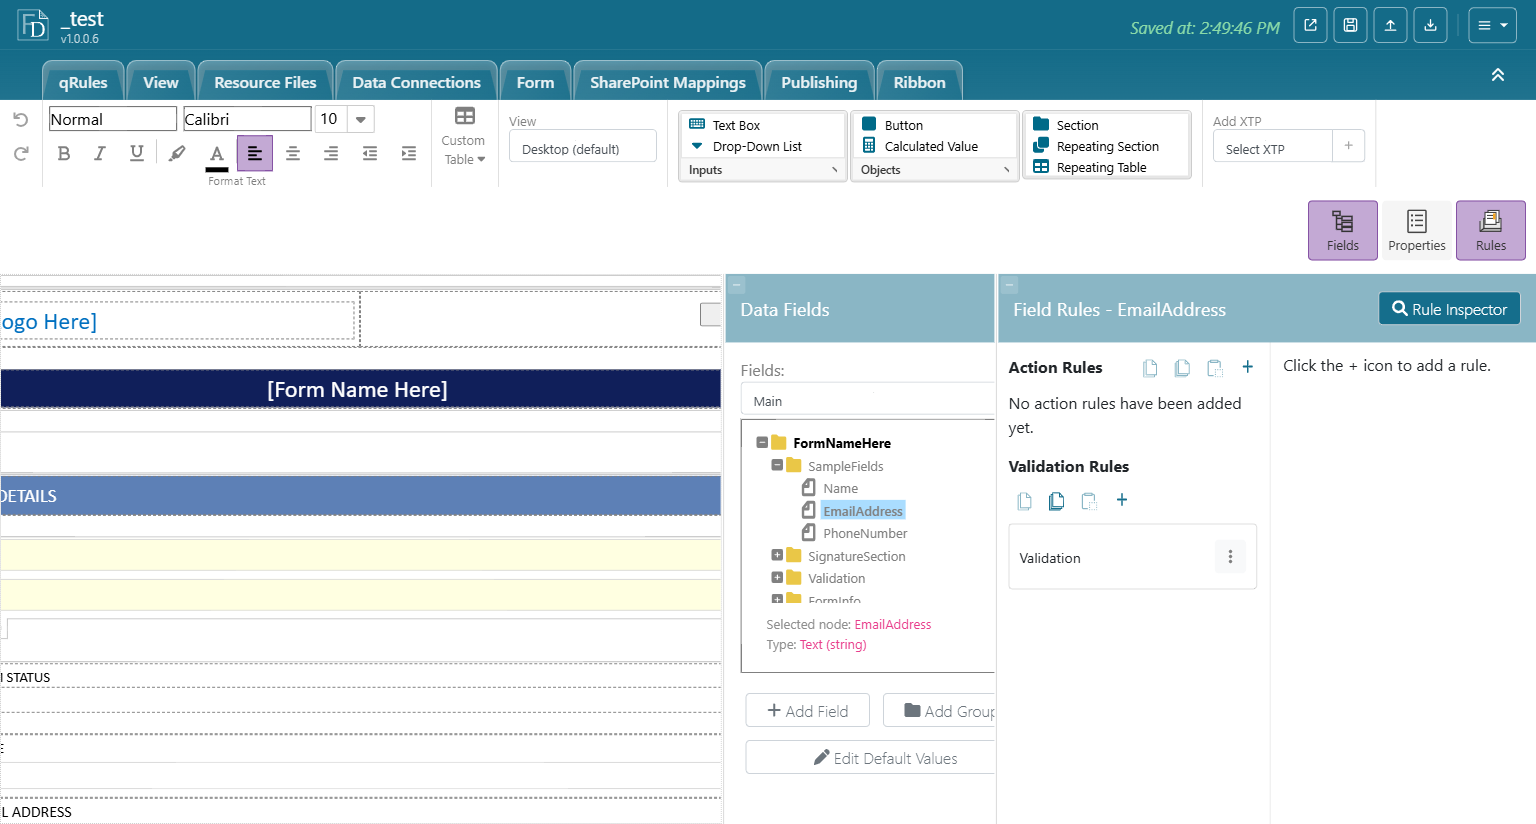
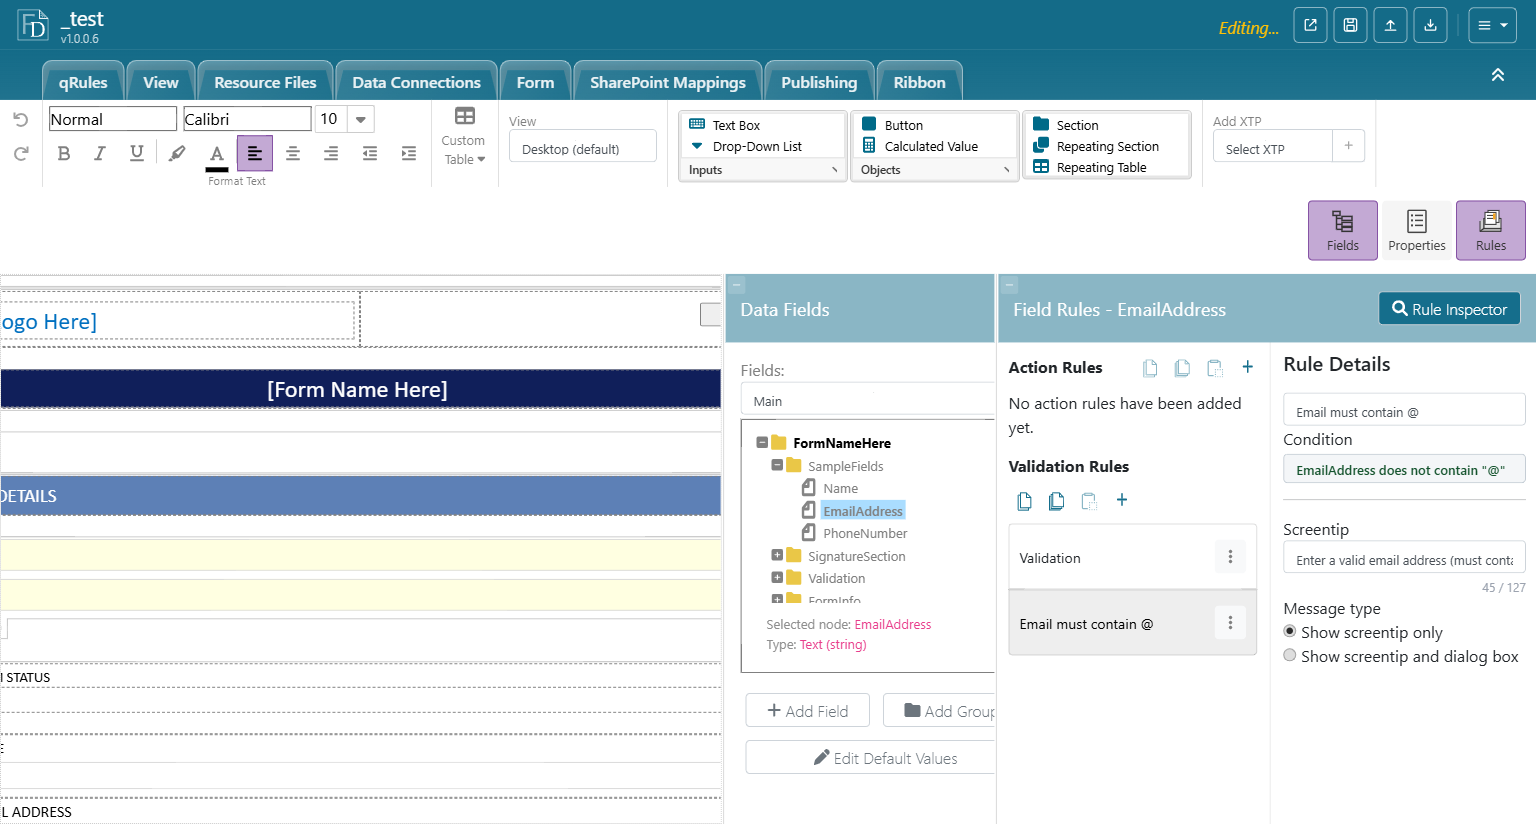
Validation rules belong to fields in the main data source. Select the field on the canvas or in the Data Fields tree, click the Rules button, and use the Validation Rules section. Buttons, form load, and secondary data sources have no Validation Rules section.
Note: Selecting a field in the Data Fields tree (rather than a control on the canvas) shows Action Rules and Validation Rules only. Formatting rules need a control, so they appear only when you select the control on the canvas.
4.3 Anatomy of a validation rule
Validation rules are simpler than action rules. There is no action list and no stop flag.
| Setting | Meaning |
|---|---|
| Rule name | Shown in the list and in the Rule Inspector. Must be unique within the field. |
| Condition | The rule fires while this is true. Note the direction: the condition describes the state that needs attention ("Name is blank"), not the good state. |
| Screentip | The message for this rule. Required, up to 127 characters (a counter shows the length). GetErrors returns these texts. |
| Message type | Show screentip only (default) or Show screentip and dialog box. |
| Dialog box message | Appears only for the dialog option. Longer text for a pop-up. |
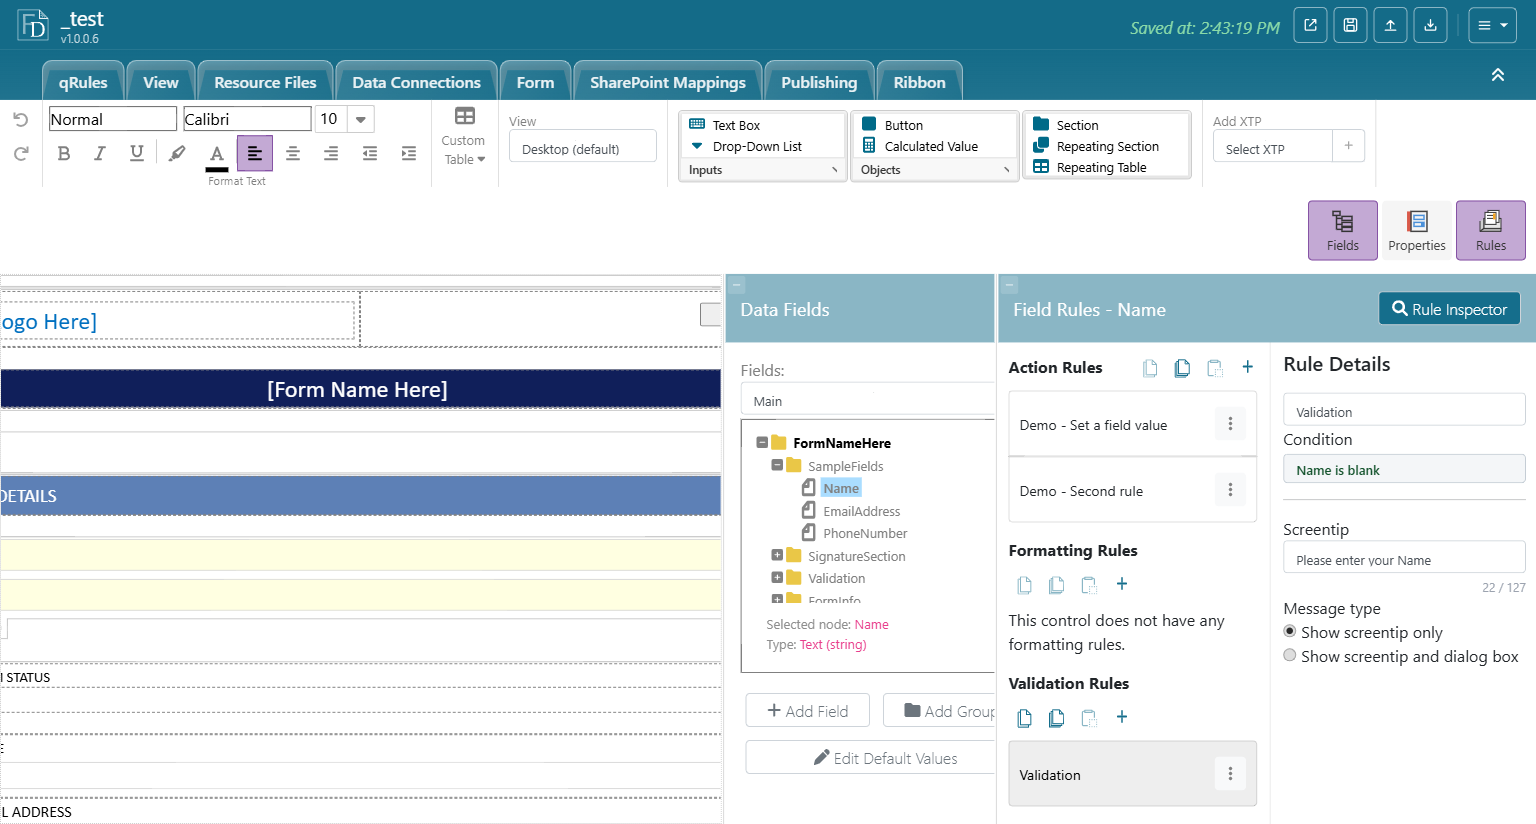
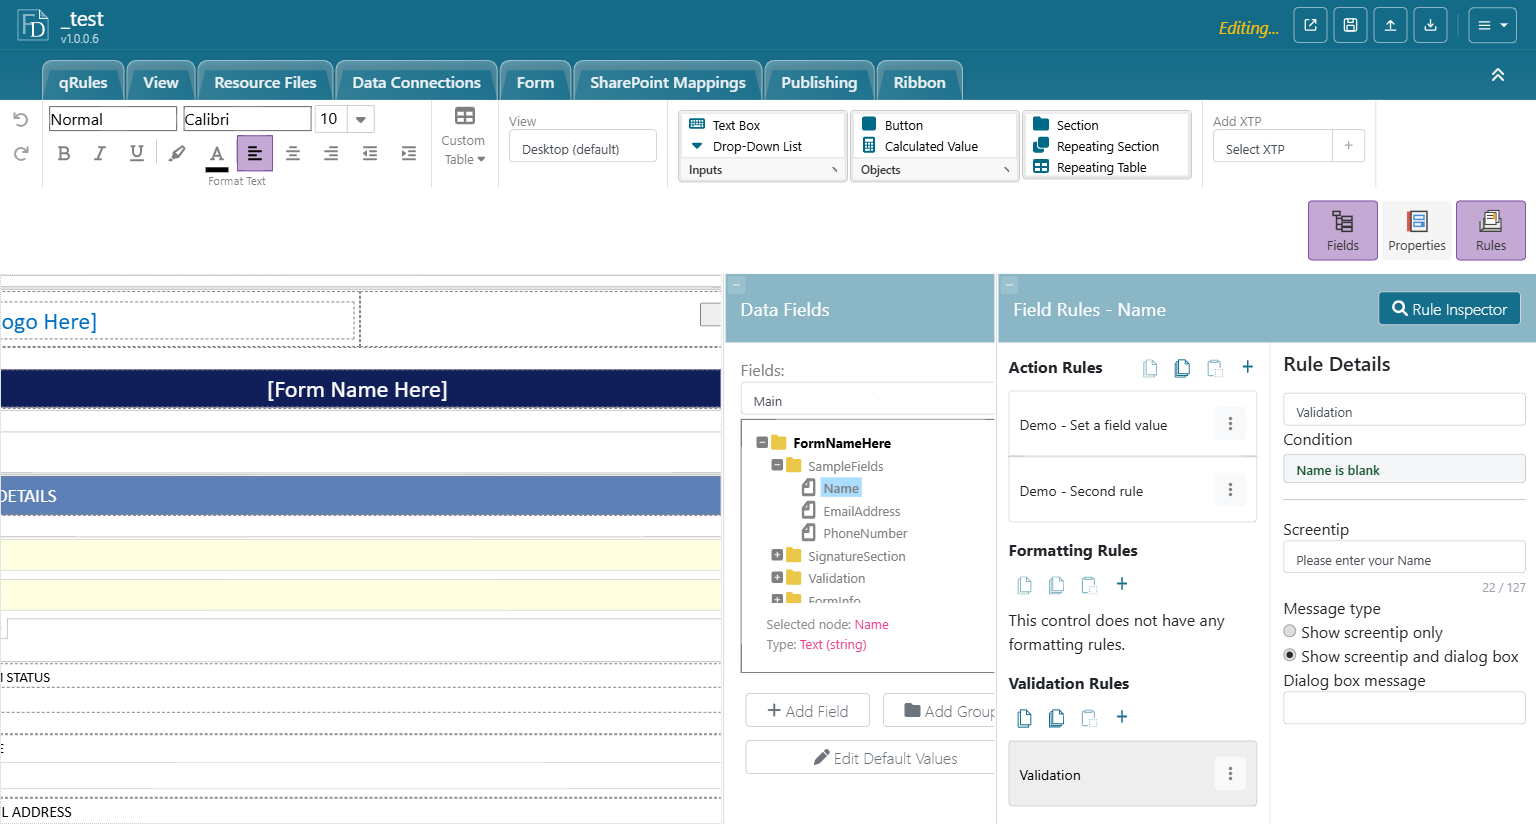
Leave the message type at Show screentip only unless you have a specific reason for a dialog. The usual way to present the messages is the Result text described in 4.6.
4.4 Creating a validation rule
- Select the field and click the Rules button.
- In Validation Rules, click +.
- A rule named "Rule 1" appears with two red hints: "Please specify a condition." and "Please specify a screentip." The rule row shows a warning icon until both are filled in.
- Type a name.
- Click the Condition line and describe the state that needs attention (Chapter 2).
- Type the screentip.
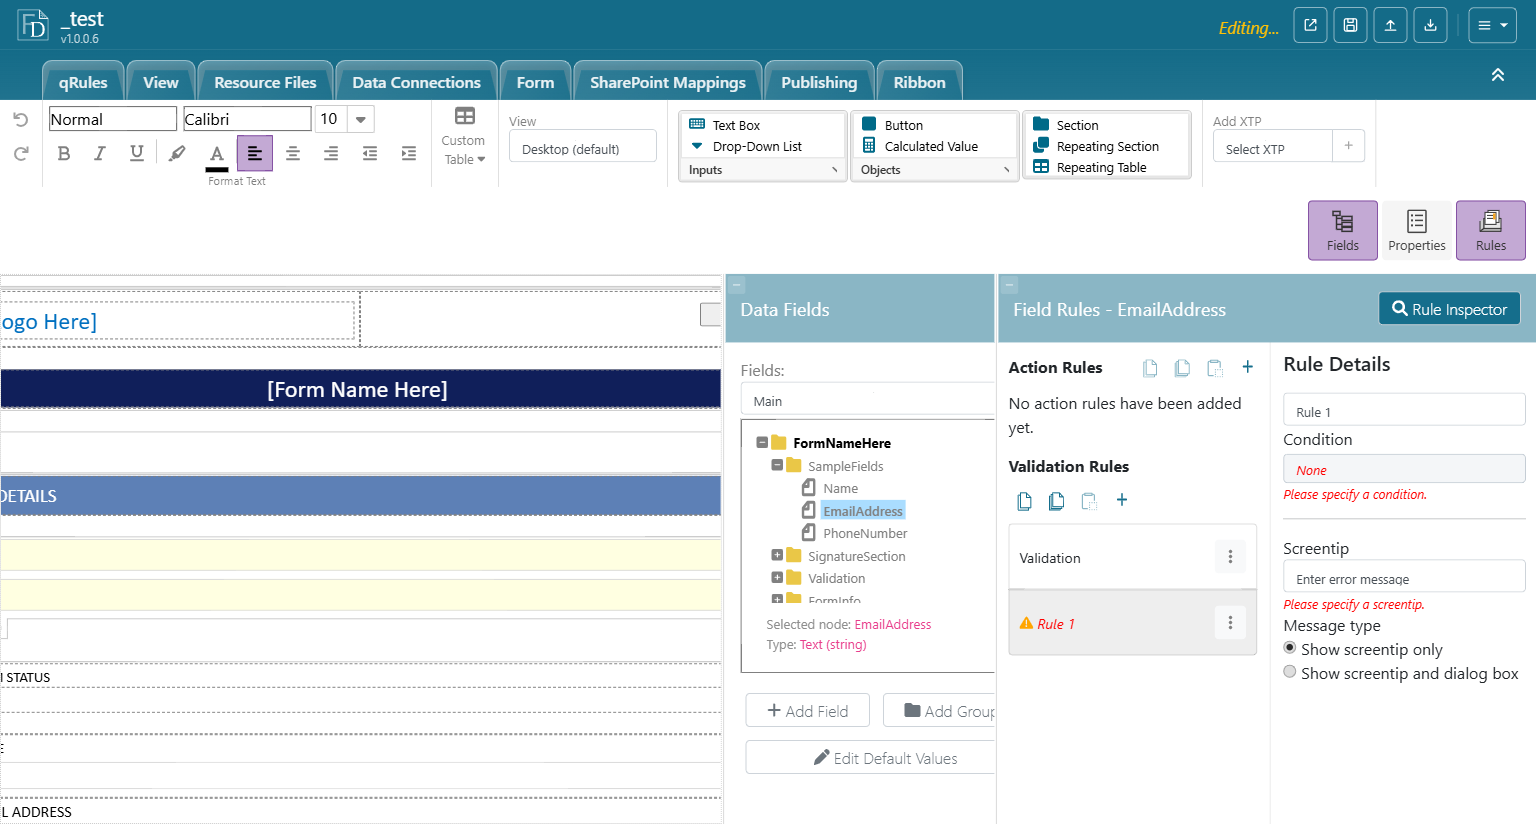
There is no save button; the designer saves as you go.
4.5 Writing conditions for validation
Because the condition describes the state that needs attention, most validation conditions are the negation of what you want:
| You want | Condition |
|---|---|
| A required field | Field is blank |
| An email-like value | Field does not contain @ |
| A value from a fixed list | Field ≠ A AND Field ≠ B |
| A date not in the past | Field < Use a formula... today() |
| End after start | The expression: ../my:EndDate < ../my:StartDate (on EndDate) |
| Conditionally required | Field is blank AND OtherField = Yes |
| A pattern | Field does not match pattern (regular expression) |
Attach cross-field rules to the field the user edits last, or the one you want highlighted. For end-after-start, put it on EndDate so the red border appears where the fix belongs.
A field can have any number of validation rules; each is evaluated independently and each contributes its own screentip to the GetErrors result. Stack small rules with specific messages (Required, Format, Business rule) rather than one large condition.
4.6 Running the check and showing the messages
This is the second half from 4.1. The sample template wires it on the Submit button; the same three rules work on any button.
Rule 1 - Check for Errors (no condition)
- Run a qRules Command:
"GetErrors /format=fieldAndMessage" - Set a field value: ErrorMessage = QdabraRules > Result
Rule 2 - Stop if Errors (condition: QdabraRules > Result is not blank, Stop after this rule runs checked)
- Set a field value: any scratch field =
""(a rule needs at least one action; this rule exists for its stop flag)
Rule 3 - Submit (the real submit action)
Notes on the pieces:
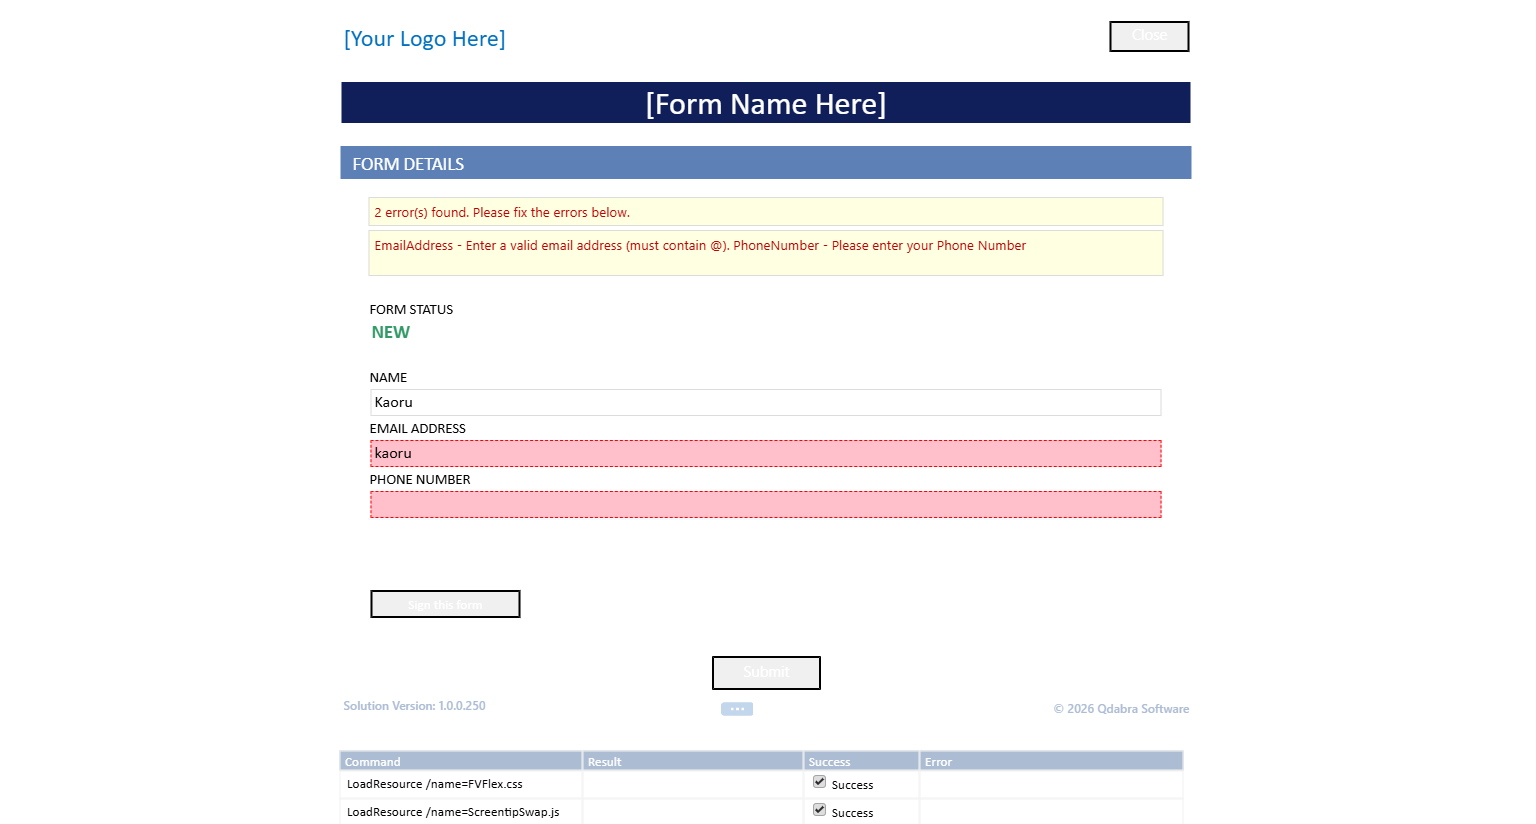
GetErrorsreturns the screentips of every failing rule, joined into one text. With/format=fieldAndMessageeach line is "FieldName - screentip"; with the default/format=messageyou get the screentips alone, which reads better when field names are technical. Result is blank when there are no errors, which is why Rule 2 tests exactly that.- Copy Result into a main field (ErrorMessage above) and bind that field to a read-only control placed where the user will look, typically just above or below the Submit button. Hide the control with a formatting rule while ErrorMessage is blank.
- To show a count as well, add
"GetErrorCount"and copy Result into a second field before the GetErrors call, as the sample template does with its "2 error(s) found" line. ClearErrorsremoves the red borders and clears the error state; run it, or clear ErrorMessage, at the start of Rule 1 so a previous attempt's messages do not linger.
4.6.1 Optional: checking while the user types
Once GetErrors has run at least once, FormsViewer can also re-check fields as the user edits them. The qRules SetValidationMode command controls this. Its /mode values are none, auto (after every interaction), afterChange (after any field in the view changes), and afterErrorChange (after a field that already has an error changes). The default is afterErrorChange. Required-field checking for fields the user never touched is opt-in: pass /validateRequiredFields=true.
4.7 Testing your rules
Before testing, prepare the two things the check needs: a button whose rule runs GetErrors, and a place that shows the copied Result (4.6). Then click Open (Ctrl+O) in the designer's title bar to run the current draft in FormsViewer, enter values that should fail, click the button, and confirm that every rule reports the message you expect and that a clean form submits.
4.8 Summary
- Validation rules are field-only and live in the main data source.
- Condition = the state that needs attention. Screentip = what to do about it.
- Rules do nothing until a button runs GetErrors (or GetErrorCount); the messages arrive in QdabraRules > Result, and you copy Result to where the user will see it. Result blank = no errors.
- Stop the submit with a rule on Result is not blank placed above the submit rule.
Next: Chapter 5 - Formatting Rules.