Chapter 4 - Configuring a License
First draft. This chapter has not been reviewed yet and may contain mistakes. Please read it with that in mind, and tell us about anything that does not match what you see.
On this page4.1 Add a license using the Web DBXL Admin Tool4.2 Add a license without opening DAT4.3 Remove a license in Web DAT4.4 Summary
DBXL comes with a trial license. If you decide to purchase DBXL, you will receive a license file via email. When you add that license to DBXL, it replaces the trial or current license on your DBXL instance. There are two methods to do this; choose one of the options in sections 4.1 and 4.2. Section 4.3 explains how to remove old licenses.
4.1 Add a license using the Web DBXL Admin Tool
- Open your browser and go to
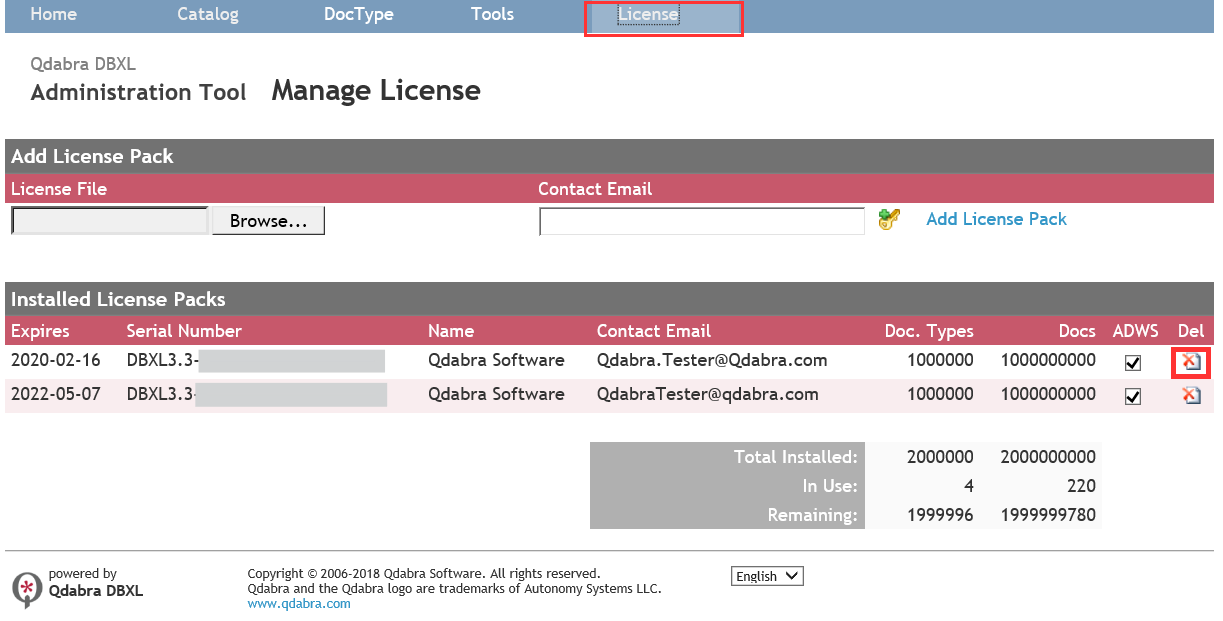
http://<servername>/QdabraWebService, where<servername>is the site where DBXL is installed. If prompted for a username and password, enter your credentials. - Click License in the header menu. The Manage License page loads.
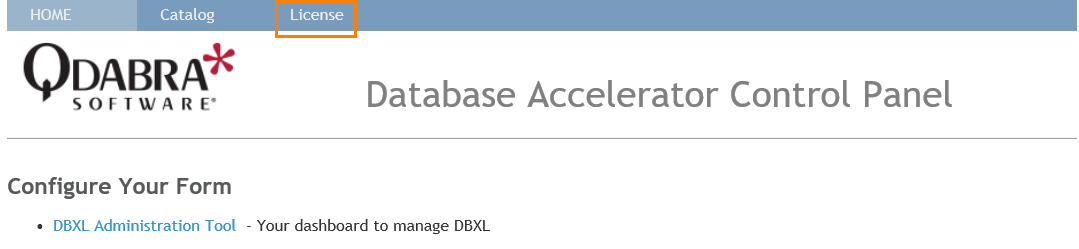
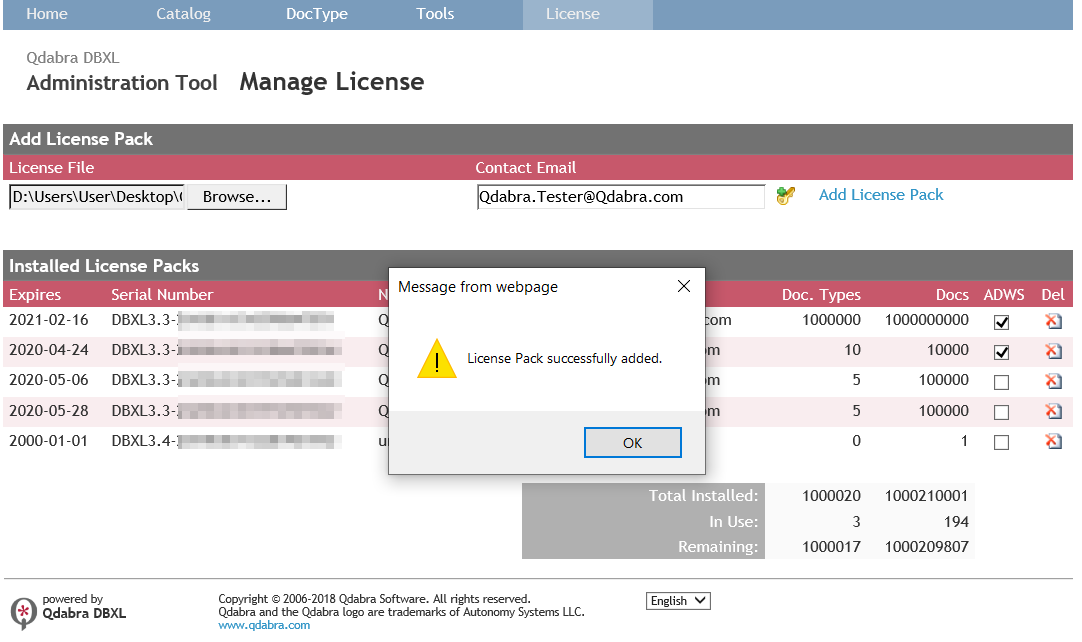
- In the Add License Pack section, click Browse and locate the license file. This field only accepts valid, base64-encoded binary data files.
- Enter the contact email associated with the license pack you selected in step 3.
- Click Add License Pack.

- A confirmation message appears. Click OK to dismiss it. The newly added license is displayed in the Installed License Packs table, showing the license's expiration date, serial number, name, contact email, and the allowed number of DocTypes and Docs. If you have configured a license that allows querying the Active Directory Web Service, the ADWS column is checked.
4.2 Add a license without opening DAT
Licenses can be added to DBXL using the DBXL Admin Tool (as explained above) or using the DBXL Licensing web service.
- To add a license using the web service, copy your license file to the server where DBXL is installed. Make a note of the file path.
- Open a web browser on the server and navigate to
http://<servername>/QdabraWebService/default.htm, with<servername>replaced with the correct address for your install. - Expand the Web Service Descriptions (click +Show to expand).
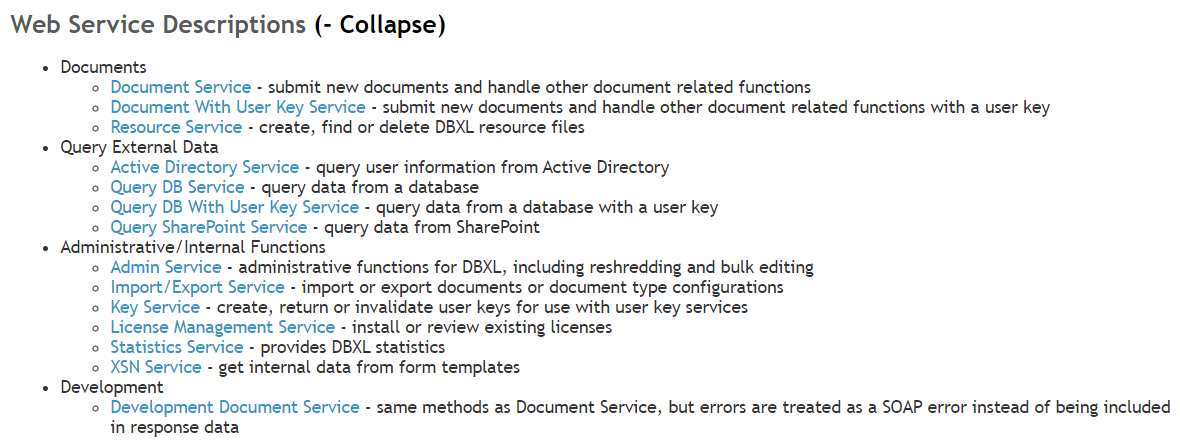
- Click License Management Service under the Administrative/Internal Functions category in the Web Service Descriptions.
- Select AddLicenseFromFile on the DbxlLicensing page.
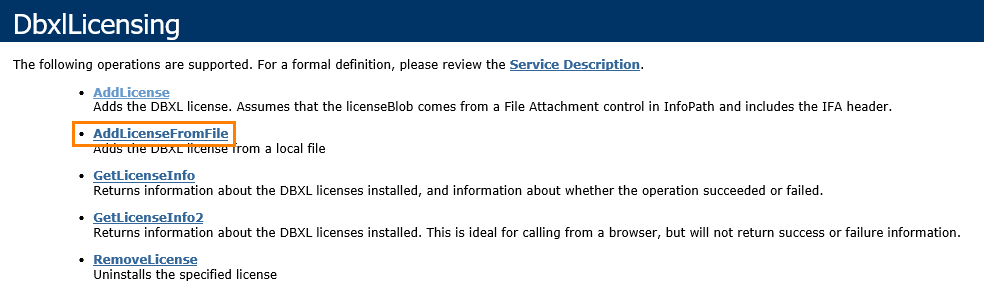
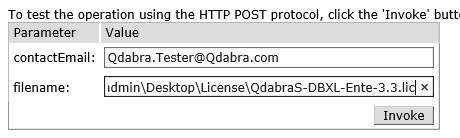
- Enter the contact email for your license and the file path to the local copy of the license.
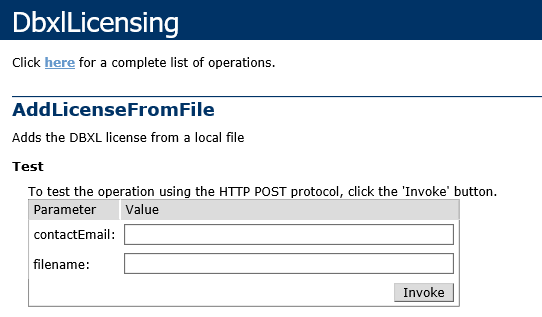
- Click Invoke.
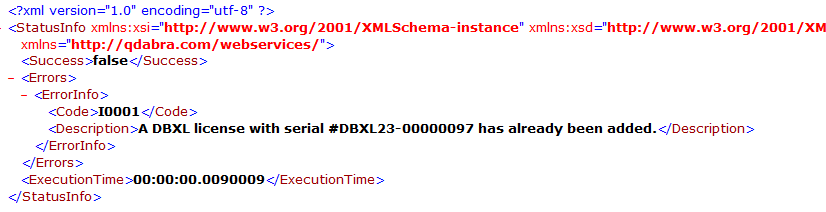
- The XML response shows Success as
trueorfalse.

- If there are any errors configuring the license, they are returned as well. For example:
4.3 Remove a license in Web DAT
If you have renewed your DBXL license, you may want to remove old and expired licenses on the Manage License page. Click the Delete button for that license row.
For help, active customers can use the Customer Support Portal. For anything else, use Contact Us or e-mail [email protected].
4.4 Summary
- DBXL ships with a trial license; adding a purchased license file replaces the trial or current license.
- The easiest method is the Manage License page in the Web DBXL Admin Tool (
http://<servername>/QdabraWebService, then License). - Without DAT, call AddLicenseFromFile on the License Management Service with the contact email and the server-side path of the license file; the XML response reports Success and any errors.
- Remove old or expired licenses with the Delete button on the Manage License page.